

Imagine a situation where someone in Germany lands on your WordPress site, thinking the content would be in German, but everything is in English. Chances are that they’ll probably leave.
Not because they can’t read English, but because they can’t find an option to switch to their native language. A site in their own language feels more trustworthy, more relevant, and easier to navigate.
I’ve worked in the WordPress ecosystem for over a decade, and a language switcher is one of those features that sounds simple, right until you actually try to add one.
Most approaches mean hunting for the right widget area, pasting a shortcode in just the right spot, writing CSS so the switcher doesn’t look broken in your theme, and then starting over the next time you change themes.
That’s where Universally comes in. It was built by a team with more than 20 years of WordPress experience, and translates content on your site using AI. It comes with a built-in language switcher that’s customizable, and you can place it anywhere on your site.
In this guide, I’ll walk you through how to add a language switcher to your WordPress site in just a few steps.
What is a Language Switcher?
A language switcher is a navigation element on your website that lets visitors choose the language they want to read your content in. It usually appears as a dropdown menu, a row of flag icons, or a set of text links showing the available language options.
You’ve probably seen these on international websites. For example, a German-speaking user clicks “DE,” the page reloads in German, and they stay on the site. Now, you can place the language switcher anywhere on your site.
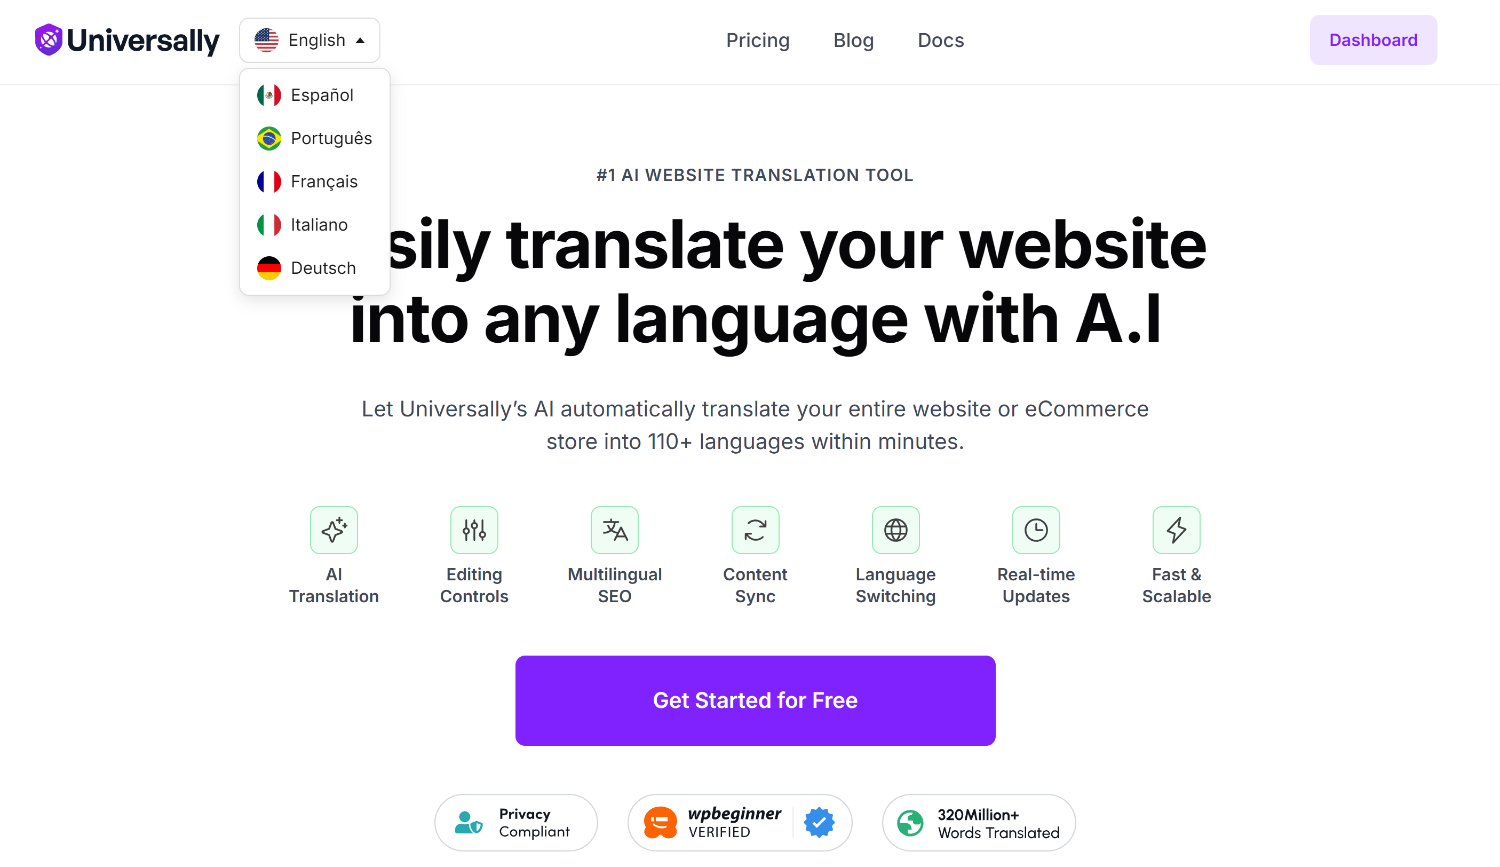
For instance, on Universally, you’ll see the language switcher at the top in the navigation menu. It appears as a dropdown with different language options.
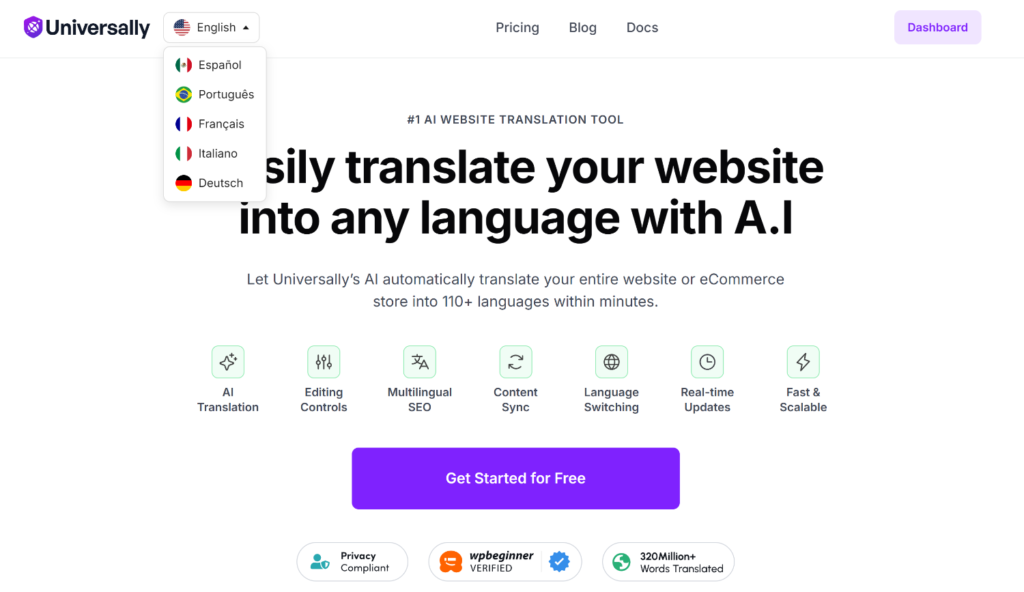
On the other hand, here’s how the language switcher looks on the WPBeginner website.
In the footer, visitors can find the option to change between the languages they want.
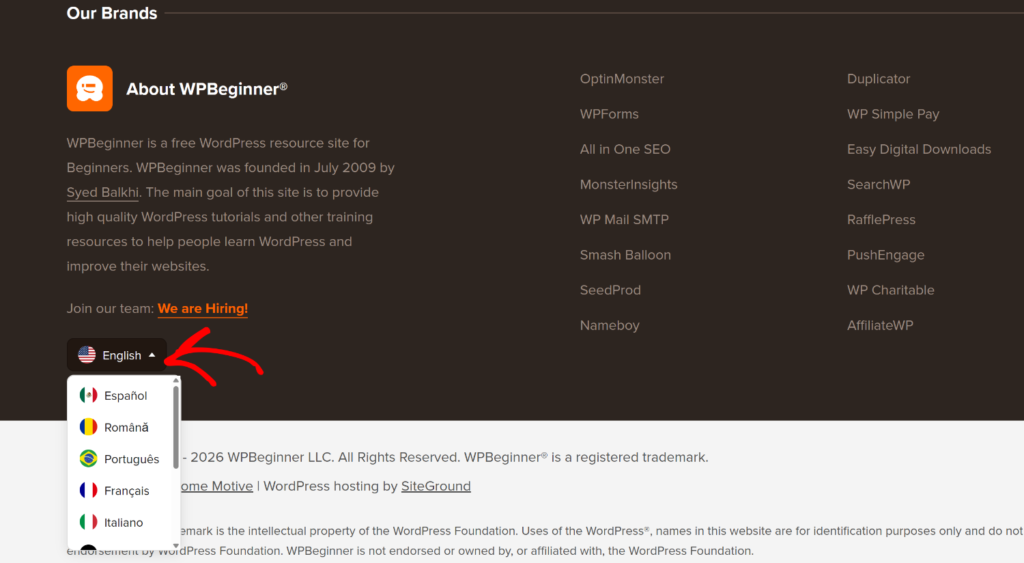
Every multilingual WordPress site needs one. Translating your content is step one, but if visitors can’t find or trigger the translated version, the translation isn’t doing its job.
Let’s look at the benefits of adding a language switcher to your WordPress site.
Why Your WordPress Site Needs a Language Switcher
A language switcher isn’t just a nice-to-have for international sites. It directly affects whether visitors stay on your site, trust your business, and take action.
Here’s what adding one can do for you:
- It builds trust with non-English visitors: When someone lands on your site and can read it in their own language, it signals that your business is made for them. That one detail can be the difference between a visitor who stays and a visitor who leaves.
- It helps you convert more international customers: For eCommerce sites, language is one of the biggest friction points in the buying journey. Shoppers who can browse and check out in their own language are far more likely to complete a purchase.
- It reduces bounce rates on your translated pages: When visitors land on a translated version of your site, a visible language switcher keeps them from bouncing back to search results. Lower bounce rates and longer sessions on those pages send positive engagement signals to search engines.
- It gives you an edge over competitors: If your competitors aren’t serving international visitors in their language, a language switcher is a straightforward way to get ahead of them.
That said, let’s look at a simple way of adding a language picker to your WordPress site.
How to Add a Language Switcher to WordPress with Universally
Universally is an AI-powered translation tool that also offers a dedicated WordPress plugin to automatically translate your entire site into 110+ languages. It also creates a language switcher for your site, without shortcodes, widget configuration, or CSS.
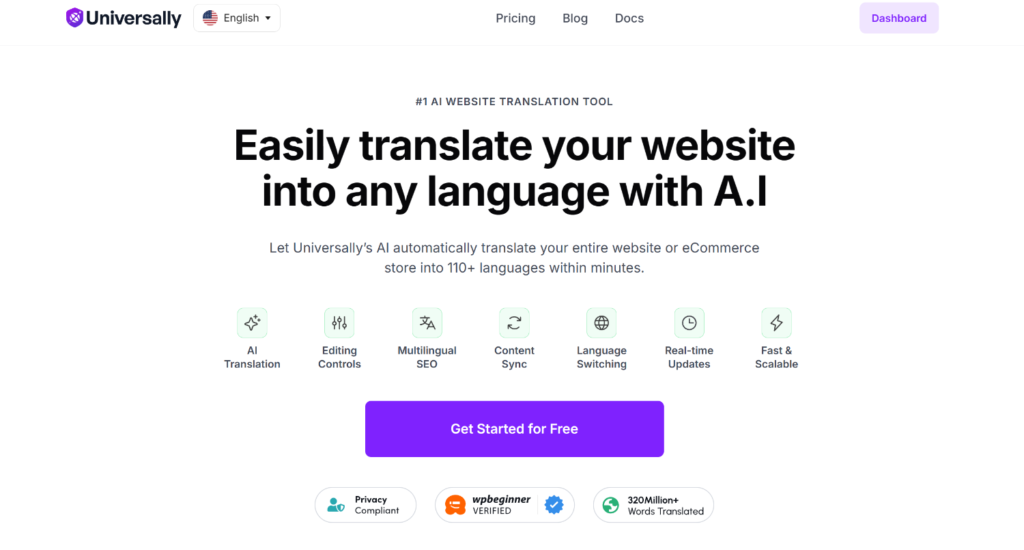
Here’s a quick look at what else Universally has to offer:
- One account, multiple sites: If you manage more than one WordPress site or WooCommerce site, you can translate and manage all of them from a single Universally dashboard.
- Full-site translation: Posts, pages, menus, image alt text, WooCommerce products, and checkout pages. Universally translates all of it automatically, without any manual copy-pasting.
- Context-aware AI: Unlike basic translation tools, Universally’s AI reads the meaning and tone of your content and adapts it naturally for each target language.
- No database bloat: Translated content lives outside your WordPress database on an external layer. Your site stays fast, and your existing setup stays clean.
- Works with any WordPress theme: Classic themes, block themes, and page-builder themes all work without extra CSS tweaks.
- Auto-generated language switcher: The switcher appears on your site automatically. You choose where to place it from your dashboard.
Now, let’s look at the steps to add a language switcher using Universally in just 5 minutes.
Step 1: Create Your Universally Account
The first thing you need to do is head over to the Universally website and create your account.
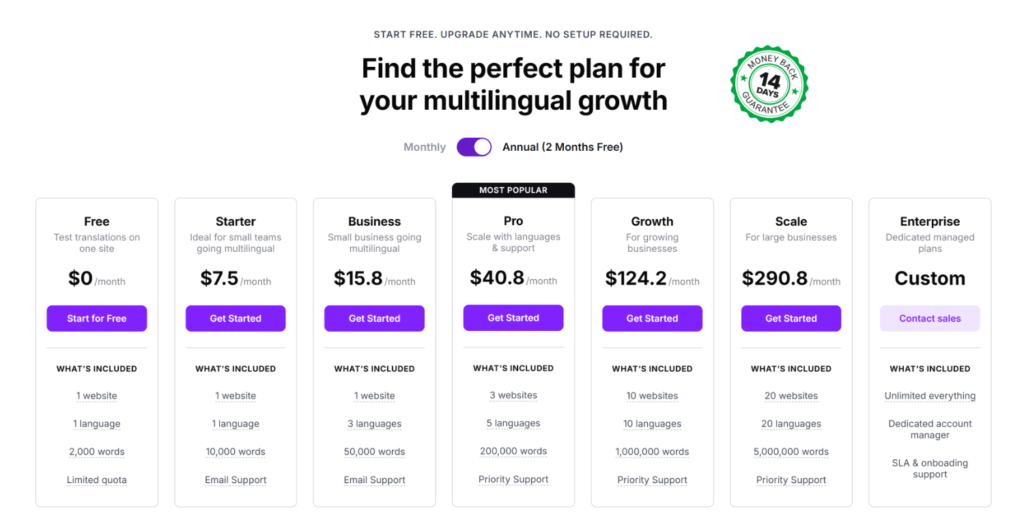
Universally offers multiple pricing plans to choose from. For instance, paid plans start at $7.50/month and scale based on how many sites, languages, and words you need. There’s also a 14-day money-back guarantee on all paid plans.
And the best part? There is also a free version that you can use to translate up to 2,000 words. This allows you to try Universally without committing to a plan and see how powerful the tool is.
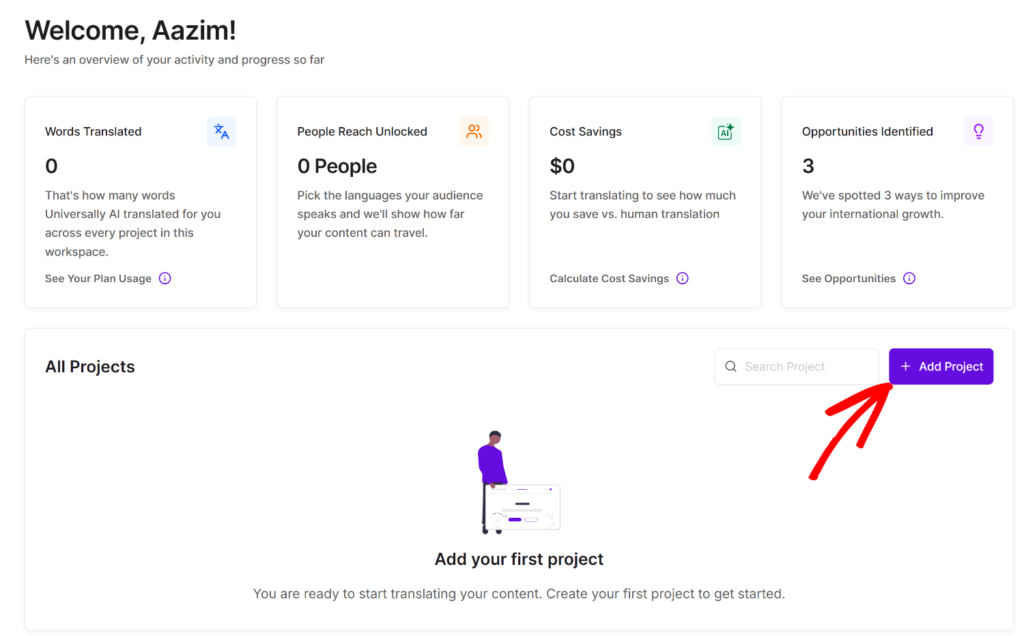
Once you’ve created a new account, you’ll see your Universally Dashboard.
Go ahead and click the + Add Project button.
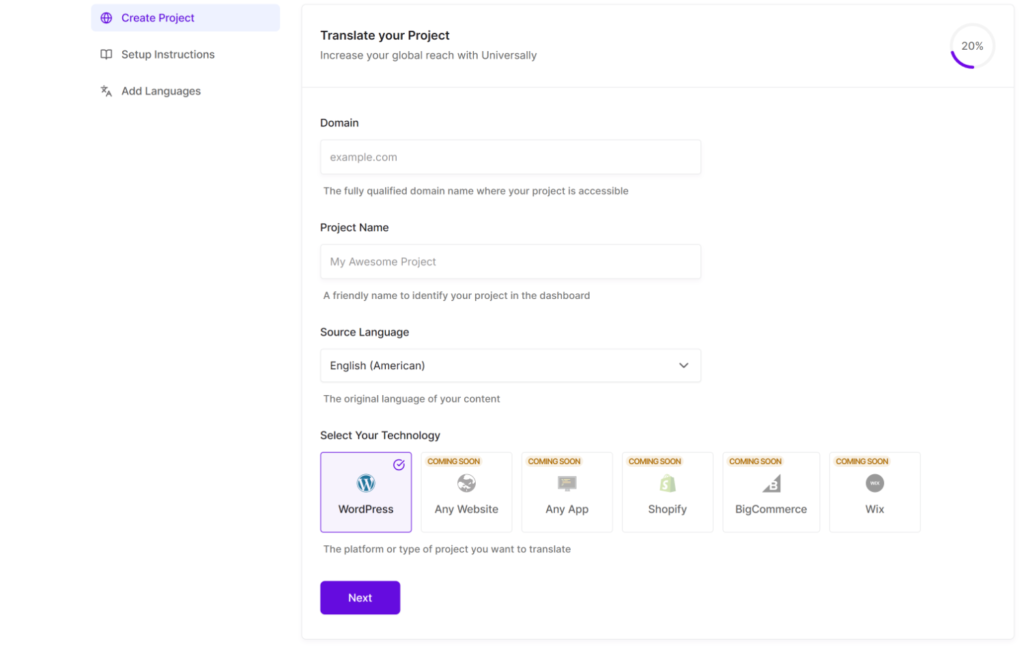
After that, you’ll need to fill out the project details. For instance, enter the domain, project name, and select a source language from the dropdown.
Then, under ‘Select Your Technology,’ choose WordPress and click the ‘Next’ button.
On the next screen, you’ll see instructions for setting up Universally on your WordPress website.
You can click the ‘Install Plugin’ button or click the ‘download the plugin’ link to save the plugin .zip files on your computer.
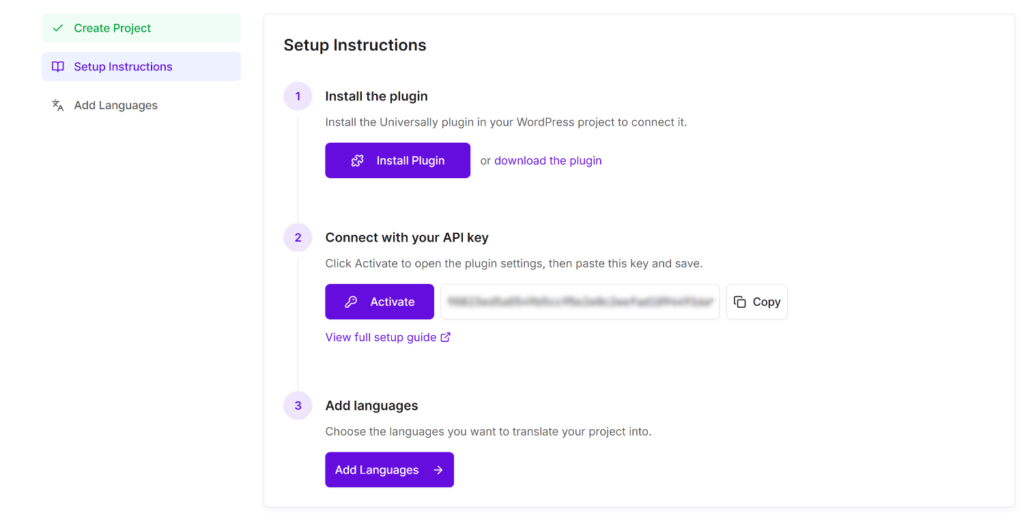
You will also see the API key for your Universally account. Go ahead and copy this as you’ll need it in the next step.
Step 2: Connect Universally to WordPress
Now the next step is to install the Universally plugin on your WordPress site that you just downloaded.
To get started, please head to Plugins » Add New from the WordPress dashboard and click the ‘Upload Plugin’ button at the top.
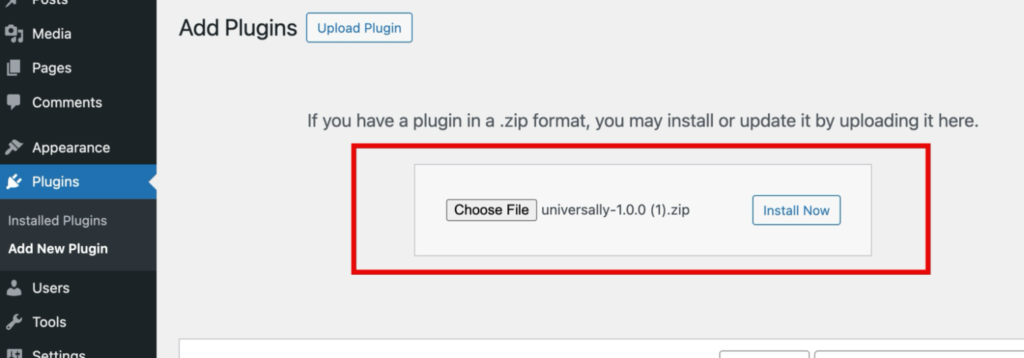
From here, you can click the Choose File button, upload the plugin .zip files, and then click the ‘Install Now’ button.
If you need help with this process, then please see this guide on how to install a WordPress plugin.
Upon activation, you’ll see the welcome screen. Go ahead and click the Connect to Universally button.
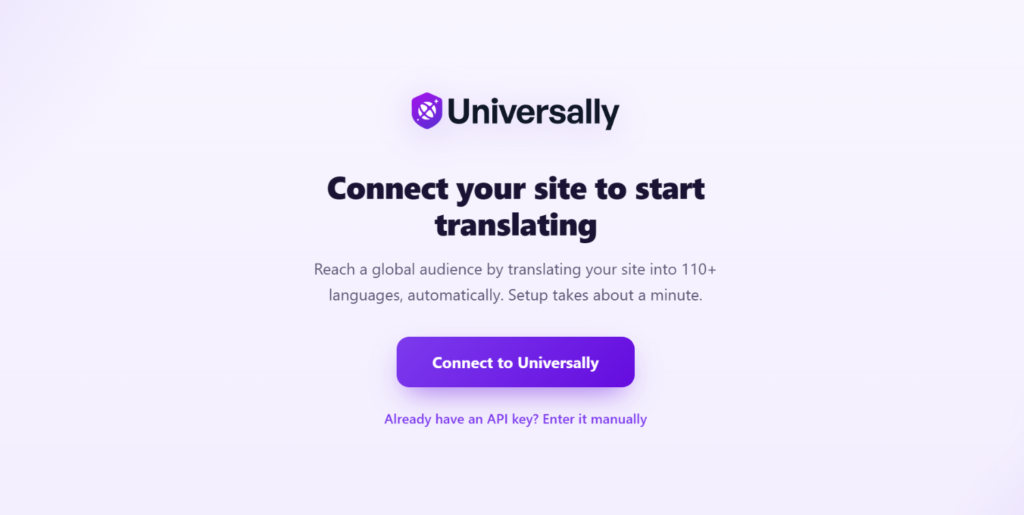
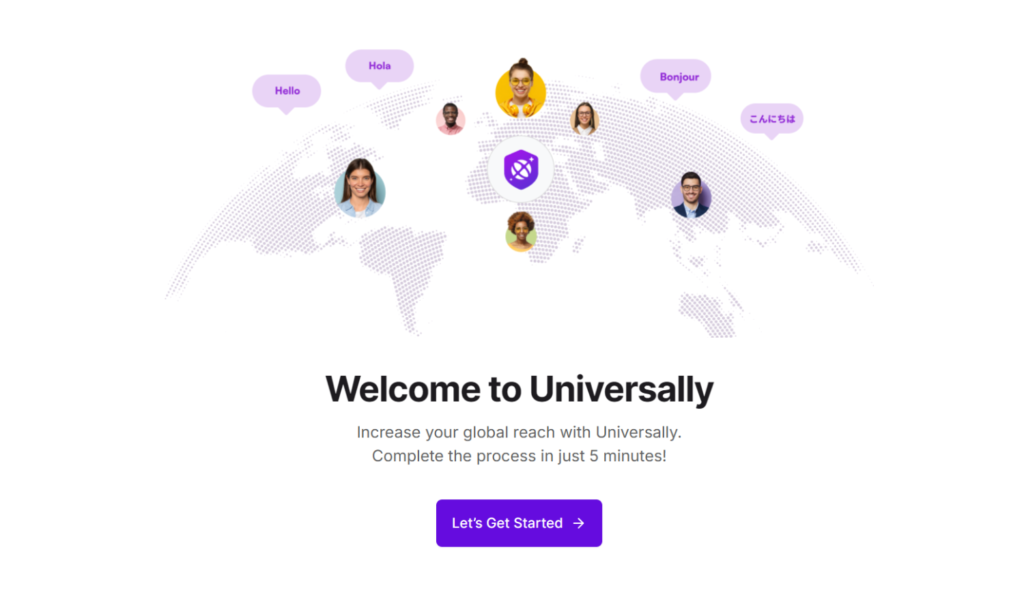
Once you click the button, the setup wizard will launch.
Simply click the Let’s Get Started button and follow the onscreen instructions.
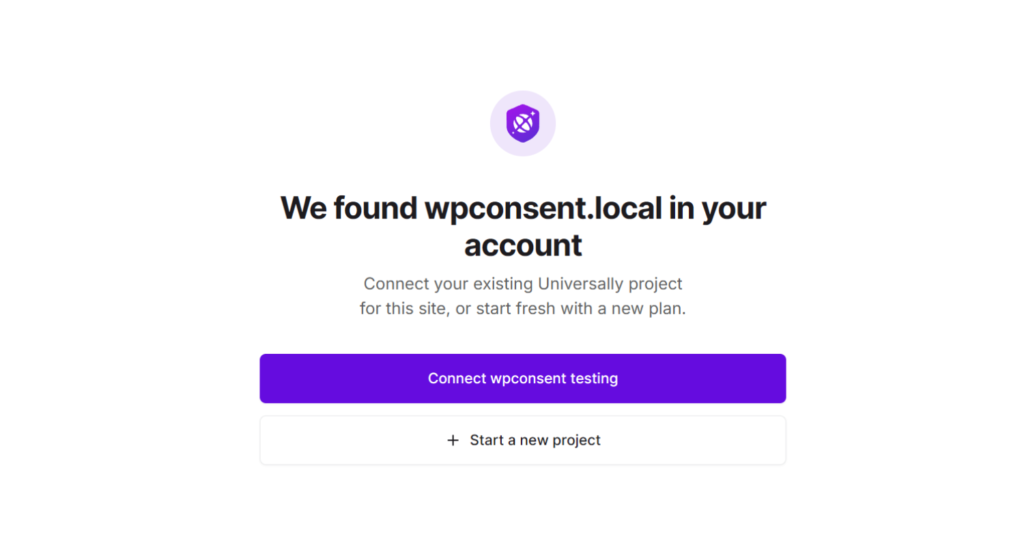
After that, you’ll see the project you created in the previous step. Go ahead and click the purple button to connect to that project.
Universally also allows you to start a new project inside the setup wizard by simply clicking the + Start a new project button.
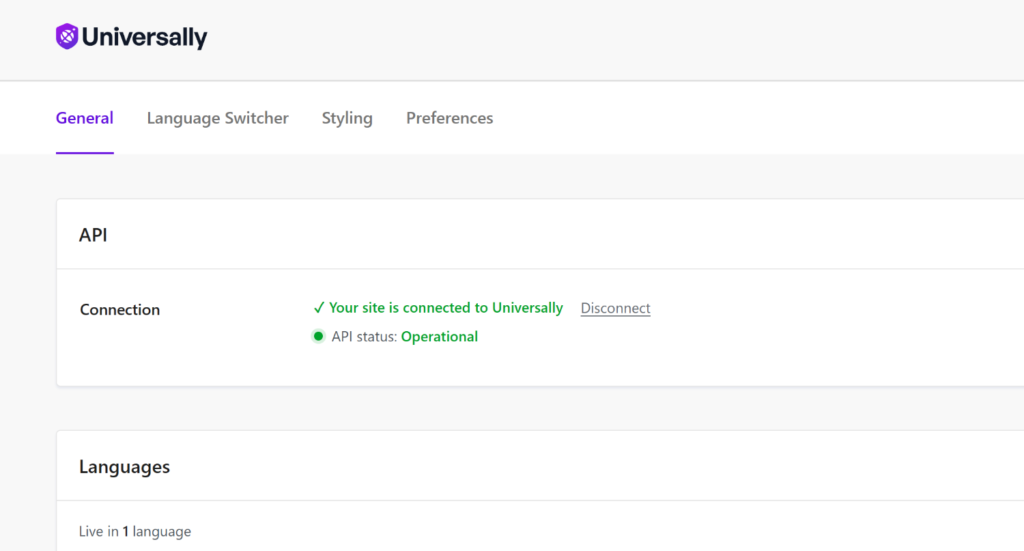
Once you’ve completed the setup, you should see the Connection under the API section turn green.
If it hasn’t, then you can manually enter the API key, which you’ll find in the Universally Dashboard for that particular project.
Step 3: Add Languages for Translation
Now that Universally is up and running on your WordPress site, the next thing to do is select the languages you want your site to be available in.
To start, simply scroll down under the ‘General’ tab to the Languages section and click + Add Languages.
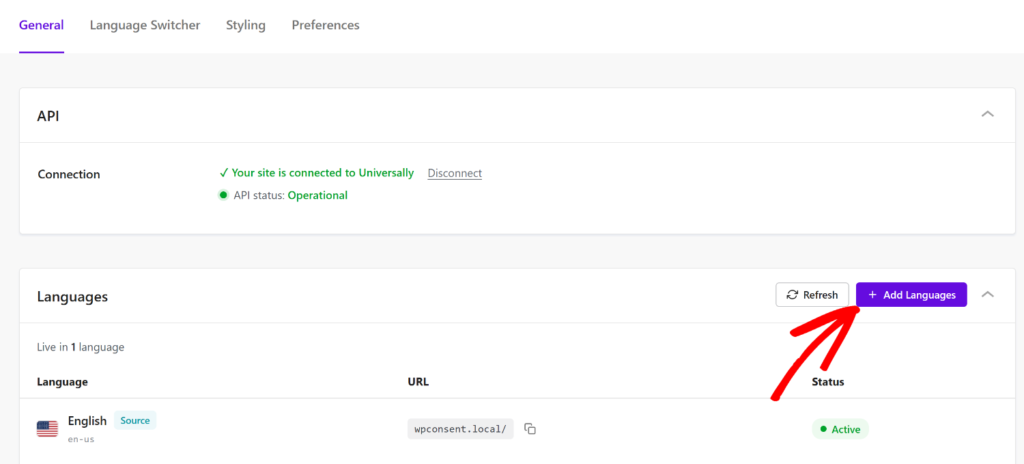
From here, you’ll be redirected to the Universally dashboard.
Simply click the Add Language button.
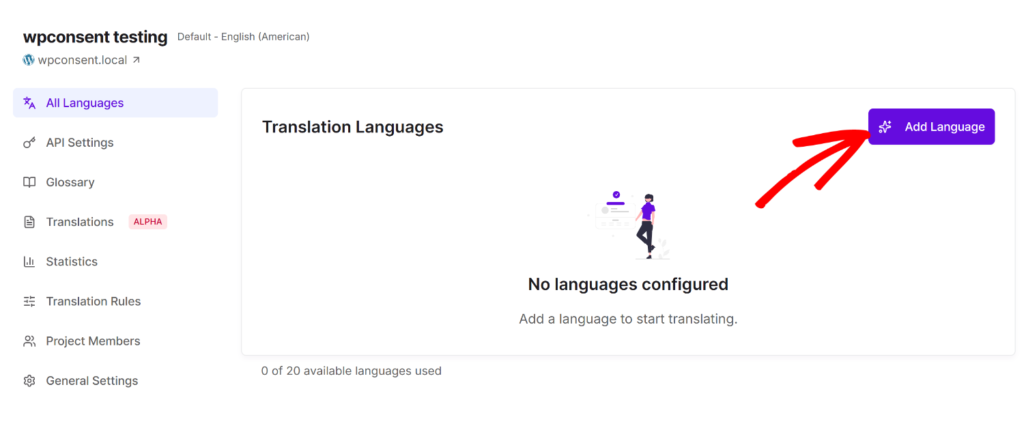
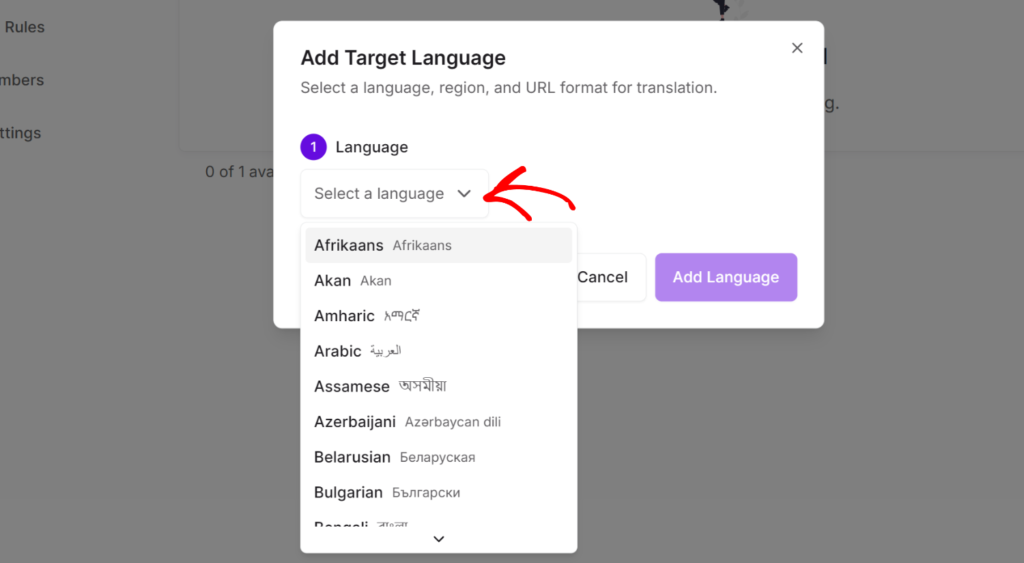
Next, a small popup box will open where you can select a target language.
Go ahead and click the Language dropdown menu and choose one from the list. With Universally, you can choose from over 110 languages to add to your site.
After selecting the language, you can then choose the Region. For example, if you want to show your content in French, then you have an option to select French as used in France or Canada.
Besides that, there is also an option to select the URL Format for your translations. Choosing a URL format is important because it determines how the address of each translated page is structured.
For example, a clean URL structure like yoursite.com/fr/page makes it easy for Google to crawl, index, and serve the right language version to the right audience. Query parameter URLs like yoursite.com?lang=fr are harder for search engines to handle consistently and are generally not recommended.
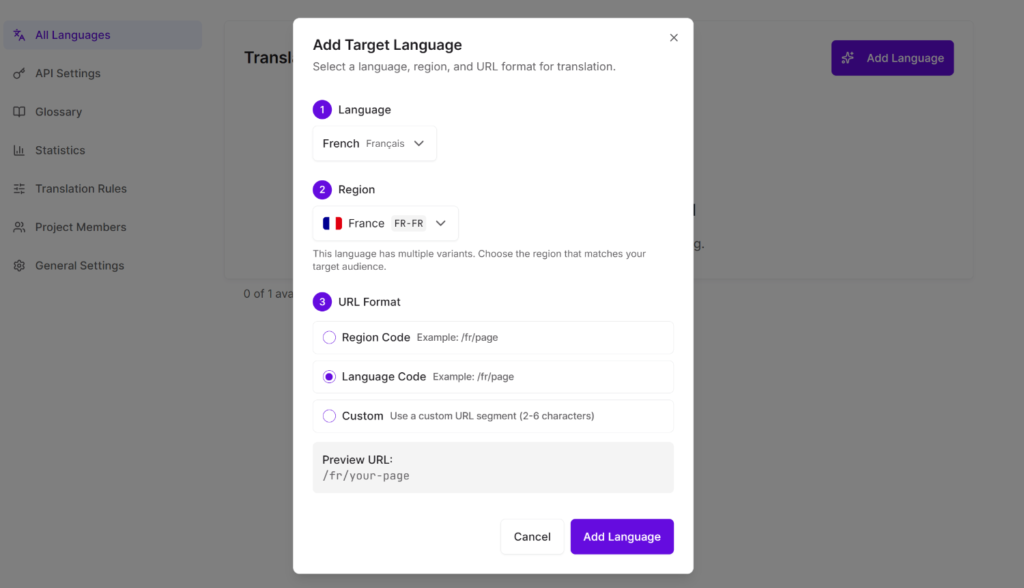
When you’re done, simply click the Add Language button.
Congratulations, your site is now multilingual!
Now, you can repeat this step and add additional languages to your website.
The best part is that Universally uses context-aware AI to translate your entire site: every post, page, menu item, image alt text, WooCommerce product, and metadata.
This isn’t the robotic word-for-word translation you might be thinking of. Universally’s AI understands the meaning, tone, and context of your content and adapts it naturally for each language.
It also keeps all of your translated content completely outside your WordPress database. That means no added bloat, no slowdown, and no conflicts with your page builder or existing plugins. Your site stays fast.
Step 4: Add a Language Switcher to WordPress
Next, you can head back to your WordPress website dashboard and go to Universally from the admin panel.
From there, simply switch to the Language Switcher tab.
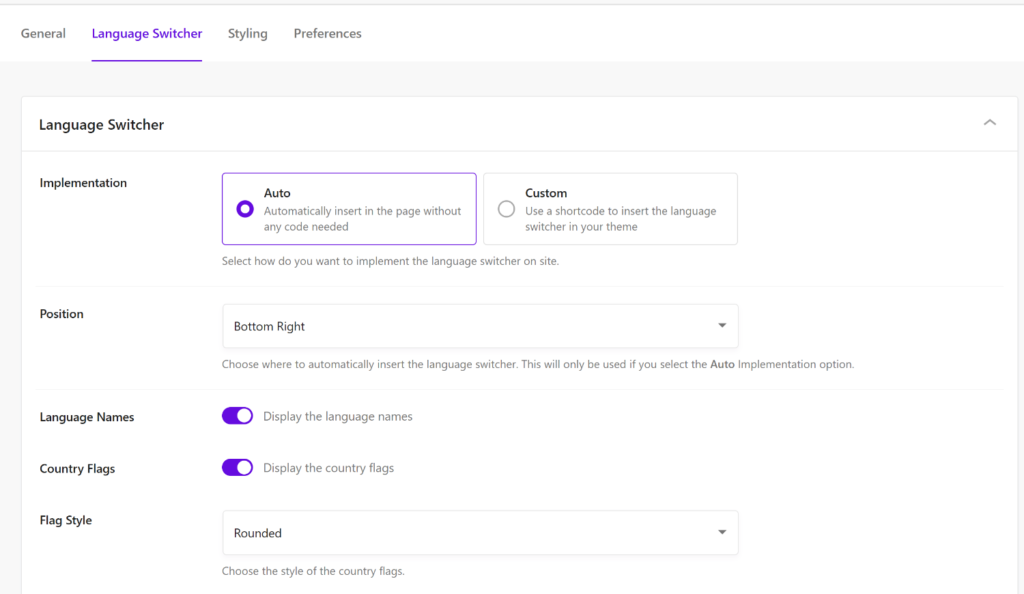
You can now choose how you’d like to implement the language switcher on your site.
By default, Universally will automatically insert it on your site without any code needed. It also lets you select where the switcher will appear using the Position dropdown menu. For example, you can display it in the bottom left or right corners, or the top left or right corners.
Besides that, there are options to show the language name, country flags, and change the flag style.
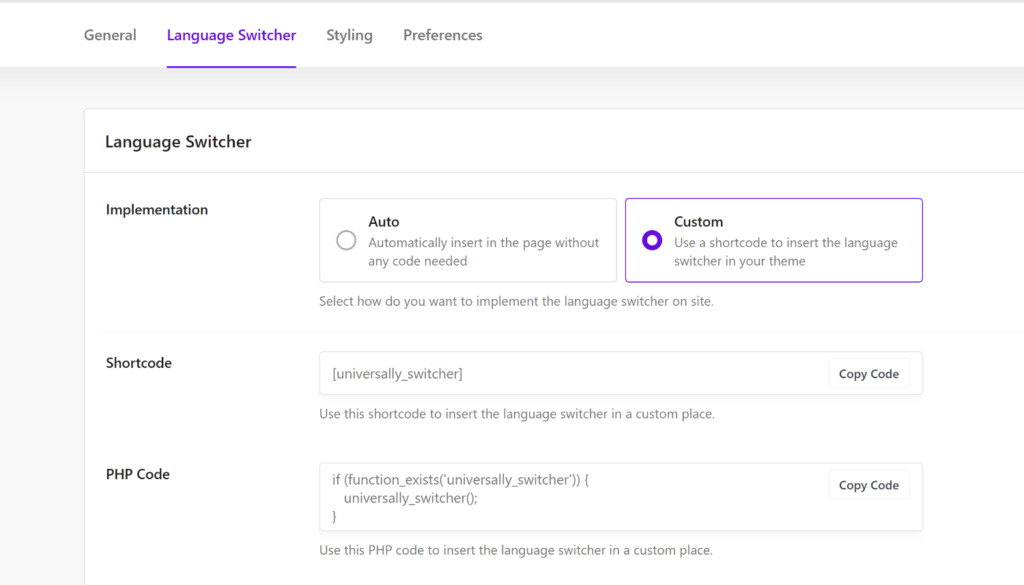
On the other hand, if you’d like to display the language switcher in your theme (like the footer) or a custom area, then Universally also lets you do that with ease.
Simply select the Custom option under Implementation. You’ll then see a shortcode and PHP code for the language switcher. Go ahead and copy them and then place them anywhere on your site.
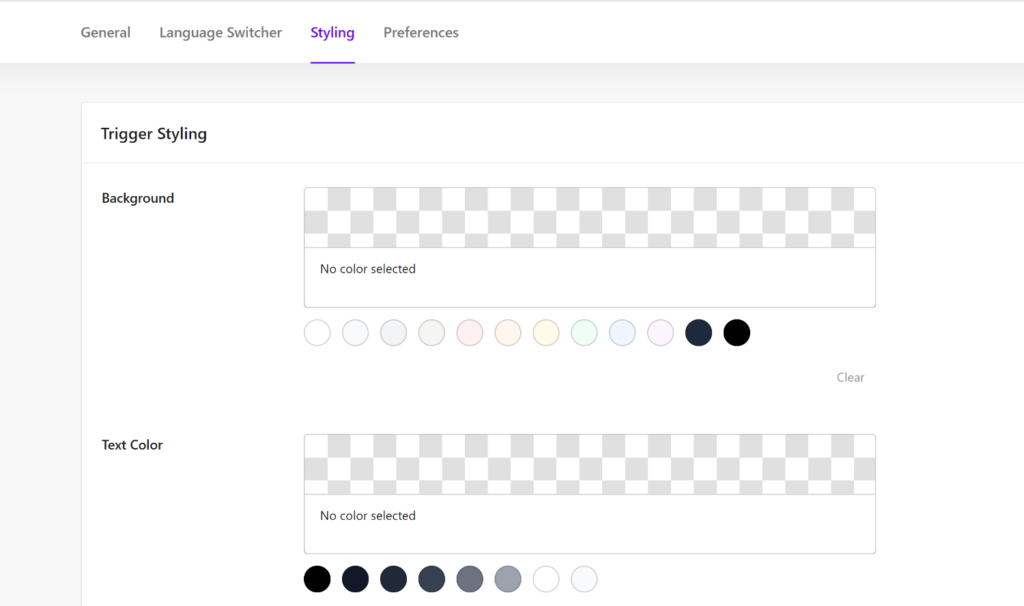
Next, you can switch to the ‘Styling’ tab and customize your language switcher.
There are options to change the trigger styling and choose a background color, text color, border color, and more. Plus, you can also edit the dropdown styling for your language switcher.
When you’re done, simply save your changes.
Now, you can visit your website and see the language switcher in action. For instance, here’s how it appears on the Universally website.
FAQs about Language Switcher for WordPress
1. What is a language switcher in WordPress?
A language switcher is a navigation element (usually a dropdown menu, flag icons, or text links) that lets visitors choose which language to view your site in. When a visitor selects a language, they’re shown the translated version of the current page. It’s a standard feature on any multilingual WordPress site.
2. Do I need to know how to code to add a language switcher to WordPress?
No. With Universally’s WordPress plugin, you don’t need to write any code, paste any shortcodes, or edit your theme files. Universally generates the language switcher automatically as part of the translation setup. You choose where you want it to appear from the dashboard, and it updates across your entire site.
3. Which WordPress themes does a language switcher work with?
Universally’s language switcher works with any WordPress theme: classic themes, block themes, and themes built with page builders like Elementor or Divi. Because the switcher is generated outside your theme files, it doesn’t conflict with your existing design.
4. Where is the best place to put a language switcher on a WordPress site?
The navigation menu is the most visible spot and works well for most sites. A floating widget is useful for content-heavy sites where the header scrolls out of view quickly. Many sites use both: a switcher in the navigation menu and a floating widget, to make sure no visitor misses it.
5. Will adding a language switcher slow down my WordPress site?
Not with Universally. Translated content is stored outside your WordPress database on an external layer, so there’s no added database bloat and no impact on page load times. Your site stays as fast as it was before you added any translations.
Adding a language switcher to WordPress used to mean shortcodes, widget configurations, custom CSS, and hoping it didn’t break your theme. It was enough to put most site owners off multilingual entirely.
Universally removes all of that. Install the plugin, connect your site, choose your languages, and the switcher is already there, working with your theme, no code required.
I hope this article helped you learn how to add a language switcher to your WordPress site. You may also want to see our guides on how to create a multilingual WordPress website and why legacy translation plugins are quietly killing your website’s performance.
If you’re ready to make your WordPress site accessible to a global audience, then you can get started with Universally today for free.


Add a Comment