

Ever noticed that translating a website can also change your product names, feature names, or even your company name?
The first time I translated a site into Spanish using a tool, I did a quick pass through the homepage to check the work. The company’s product names had been translated into a made-up word that sounds like a common Spanish noun.
That is exactly what a translation glossary is for. It lets you tell which terms are off-limits or which exact wording to use, so your brand name, product names, and slogans come through the same way in every language, every time.
In this guide, I will show you how to set up a translation glossary in WordPress using Universally, and what to add to it so nothing slips through.
Why Add a Translation Glossary to a WordPress Site
A glossary is a list of terms paired with a rule for how each one should be handled whenever your site gets translated. Instead of letting the translation tool decide, you set the rule once, and it applies everywhere.
For instance, you can enter a rule for your brand name, product features, and other specific terms. This way, the translation tool always uses a specific, approved wording instead of automatically translating the brand keywords on its own.
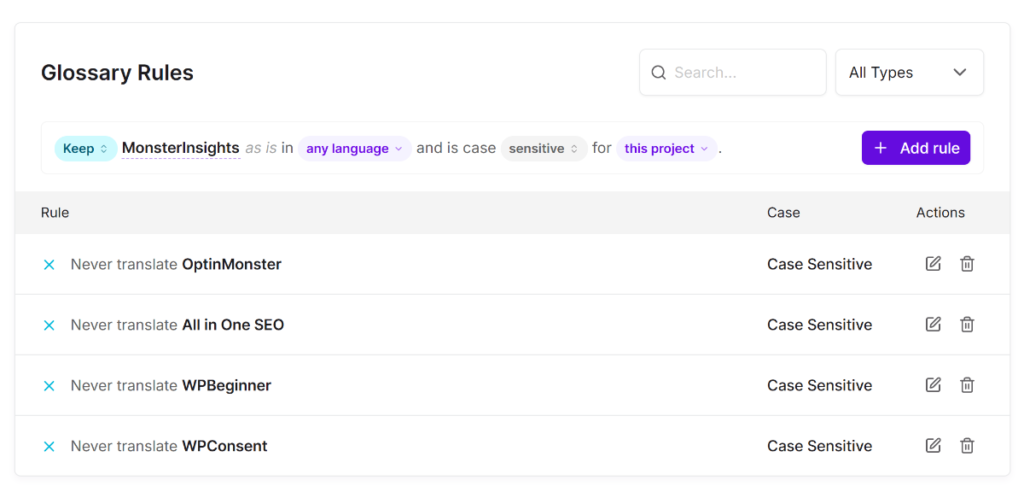
If you have not run into a mistranslated brand term yet, here is why it is worth getting ahead of.
- It keeps your product name consistent everywhere. Without a rule in place, the same term can get translated differently on different pages, since the AI is making an independent judgment call each time it sees it in context.
- It protects trademarks and legal terms. Some words cannot change, whether for legal reasons or because a mistranslation would misrepresent what you actually sell.
- It maintains a professional look. A glossary prevents important words and phrases from being altered in translation.
- It works for WooCommerce. Product titles are among the most visible places a brand term appears, and among the worst places for it to come through wrong.
That said, let’s look at how you can easily set up a glossary to protect your brand voice.
How to Set Up a Translation Glossary in WordPress
The best way to create a translation glossary in WordPress is by using Universally. It is the best AI translation tool that automatically translates your website or eCommerce store into 110+ languages within minutes.
Here’s what Universally brings to the table specifically for protecting your brand voice:
- One place to manage rules across every site: If you run multiple WordPress sites through Universally, glossary rules live alongside the rest of your translation settings, which makes it easier to stay consistent if you are managing this for more than one site or client.
- Applies automatically, site-wide: Add a rule once, and it is applied automatically across the relevant pages and selected languages.
- Covers everything, including WooCommerce: The same rules apply to posts, pages, menus, and product titles and descriptions, so your WooCommerce store is covered along with the rest of your content.
- No code required: There is no theme file to edit and no snippet to paste. You can manage everything from the Universally dashboard.
- Built on context-aware AI: Universally’s translation already understands tone and meaning rather than translating word for word, so your glossary only has to handle the specific exceptions you care about, not the entire page.
Now, let’s look at the steps for setting up a translation glossary for your WordPress and WooCommerce site.
Step 1: Create Your Universally Account
To start, head over to the Universally website and create your account.
The paid plans start from $7.50/month when billed annually with a 14-day money-back guarantee, and there is also a free plan that includes up to 2,000 translated words in one additional language, enough to test the full setup before committing.
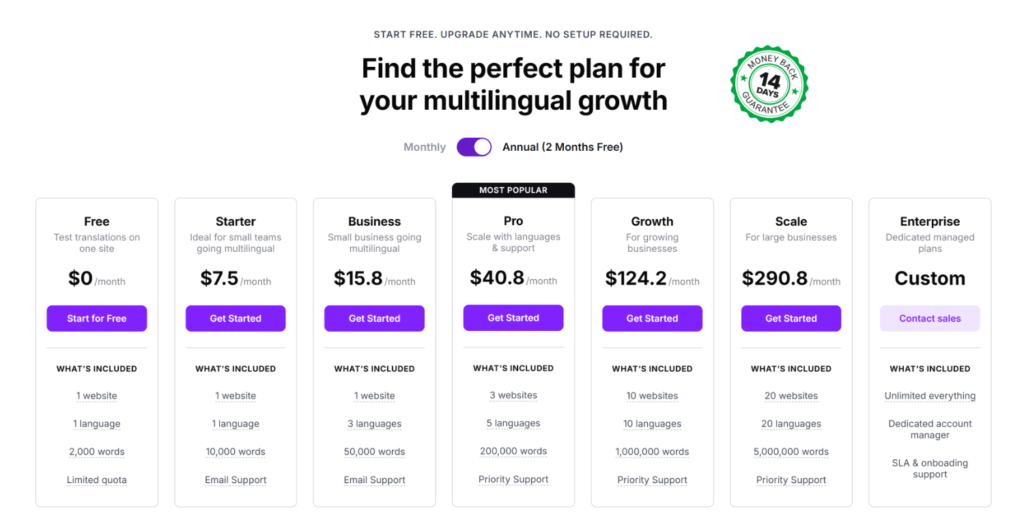
Once you have an account, you should see your Universally dashboard.
From here, simply click + Add Project.
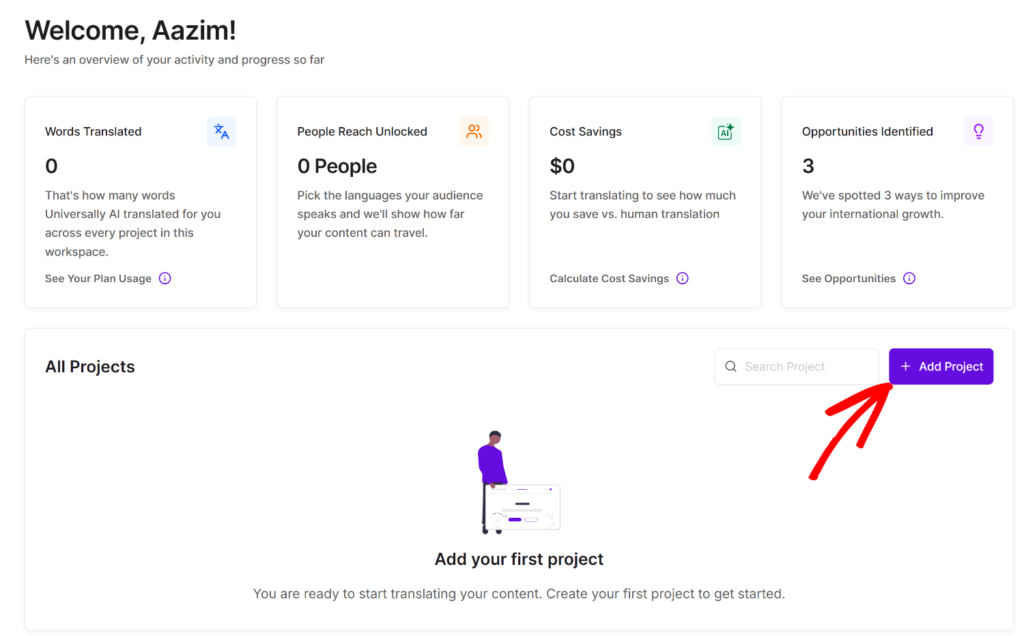
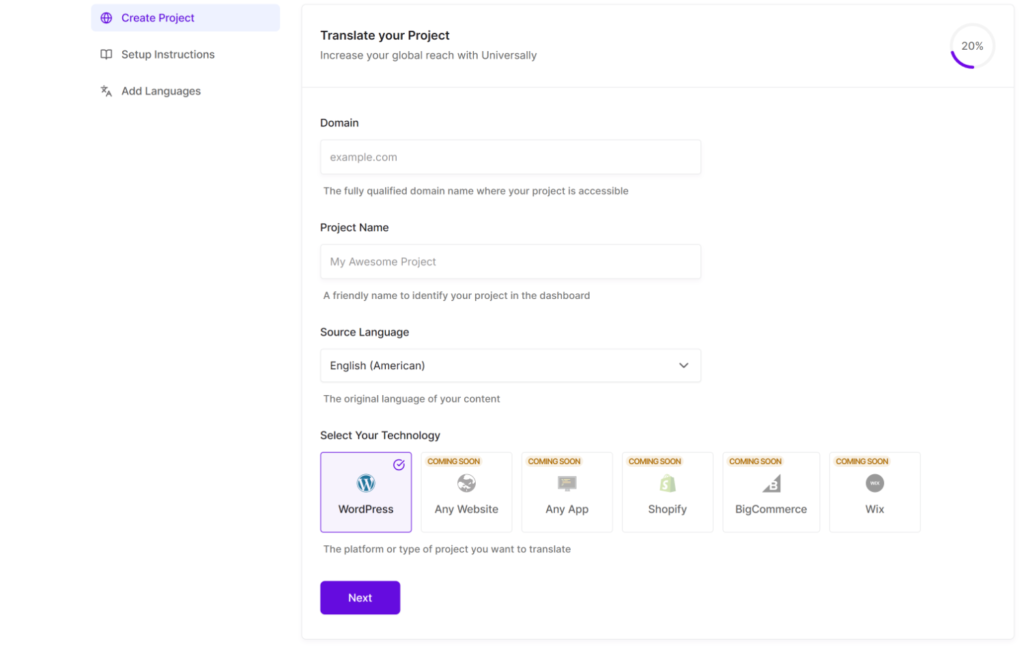
On the next screen, you can fill in your site’s domain, a project name, and your source language.
Then under “Select Your Technology,” choose WordPress and click Next.
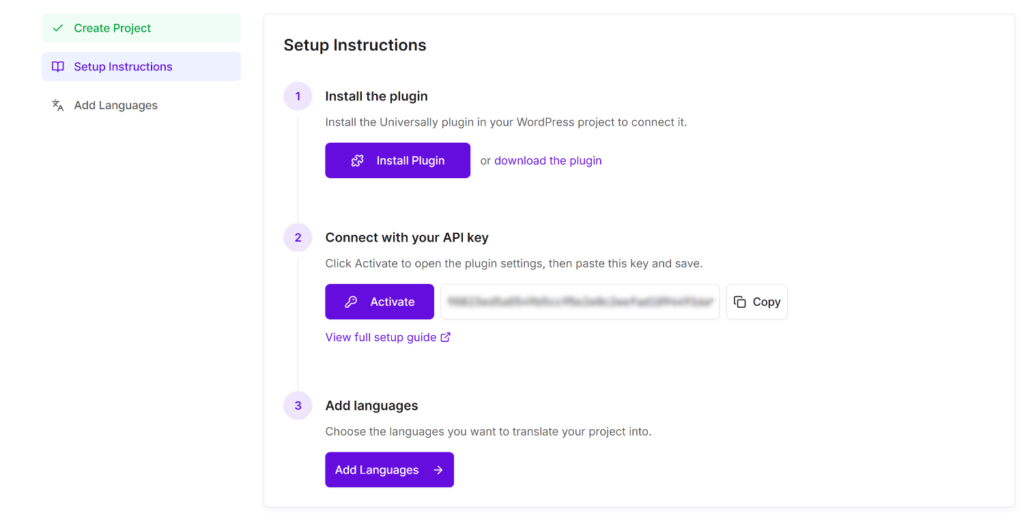
On the next screen, you can click Install Plugin, or click the “download the plugin” link to save the .zip file to your computer.
You should also copy your API key, as you will need it during the next step.
Step 2: Connect Universally to WordPress
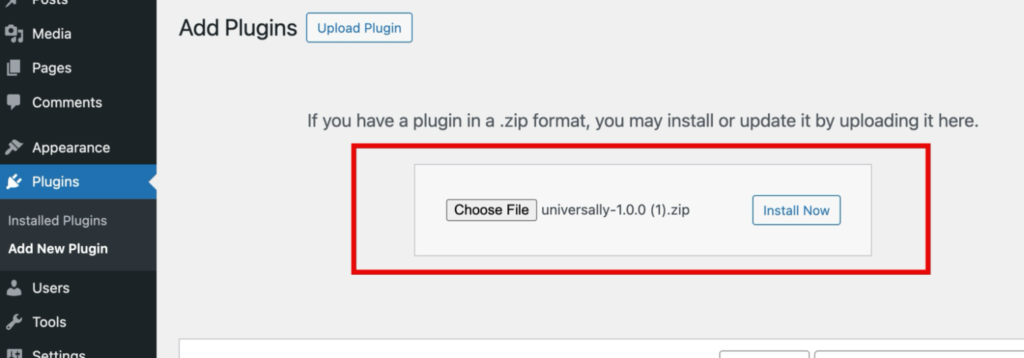
Next, in your WordPress dashboard, go to Plugins » Add New, click Upload Plugin, choose the Universally .zip file you downloaded, and click Install Now.
Once the installation finishes, click Activate Plugin.
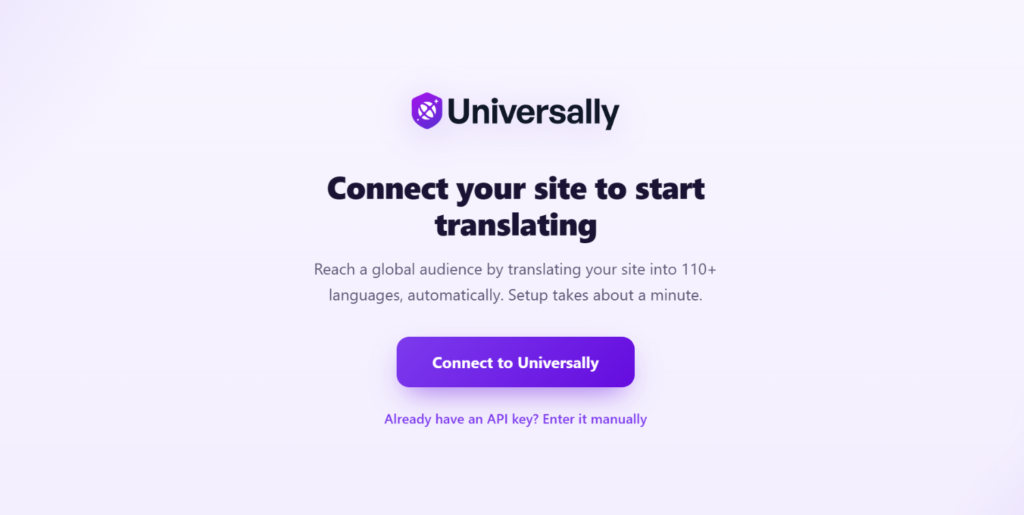
You will see a welcome screen.
Go ahead and click Connect to Universally and follow the instructions in the setup wizard.
For more details, you can see our guide on how to create a multilingual WordPress site.
Step 3: Add Your Glossary Rules
Pro Tip: Before you start, put together a short list of the terms you want to protect. These can include your brand name, product names, taglines, or any trademarked or technical terms specific to your business. You will add these once your account is connected.
To set up a translation glossary that protects your brand terms, go to your Universally dashboard and open the Glossary tab. From here, you can enter the term or phrase to create a glossary rule.
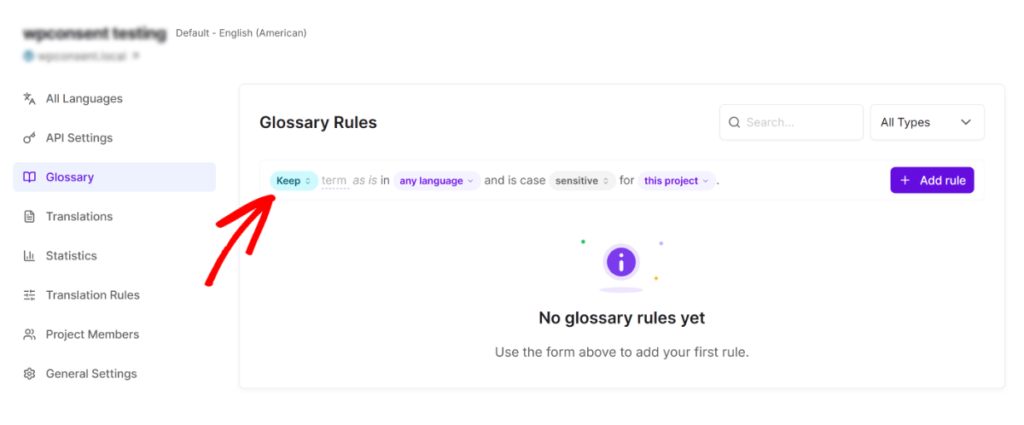
Universally lets you choose a rule type:
- Keep. The term stays exactly as written, in every language, no exceptions. This is the right choice for brand names, product codes, and trademarks. For example, you could keep ‘Nike’ unchanged across every language.
- Translate. The term always translates to a specific wording you provide for a specific language. This is useful when the AI’s default translation is technically correct but not the phrasing you actually want.
For most brand names, Keep is what you want. Save Translate for slogans or phrases where you have an approved wording in mind.
Next, you can enter your brand name, slogan, product name, or any term and then click the language targeting dropdown. Here, you can apply the rule to all languages (Any language) or select a specific language (like Spanish or French) that you’ve set up.
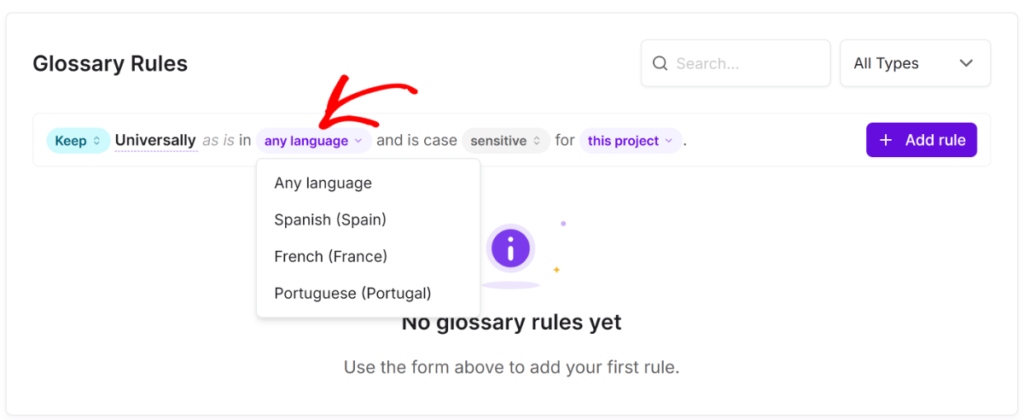
There is also an option to select whether the term is case-sensitive or case-insensitive.
After that, you’ll also have an option to apply the rule to the current project or the whole workspace.
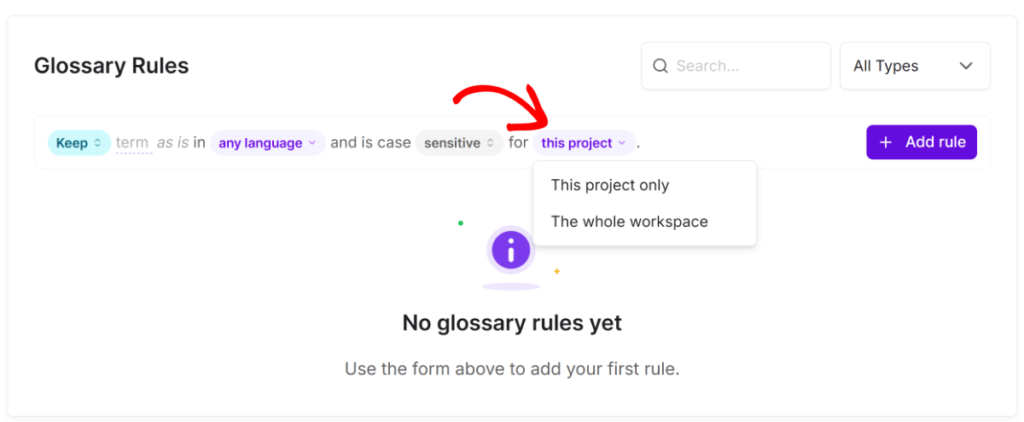
When you’re done, simply click the + Add rule button.
You can now repeat this step to add additional product names, technical terms, brands, and phrases to the translation glossary.
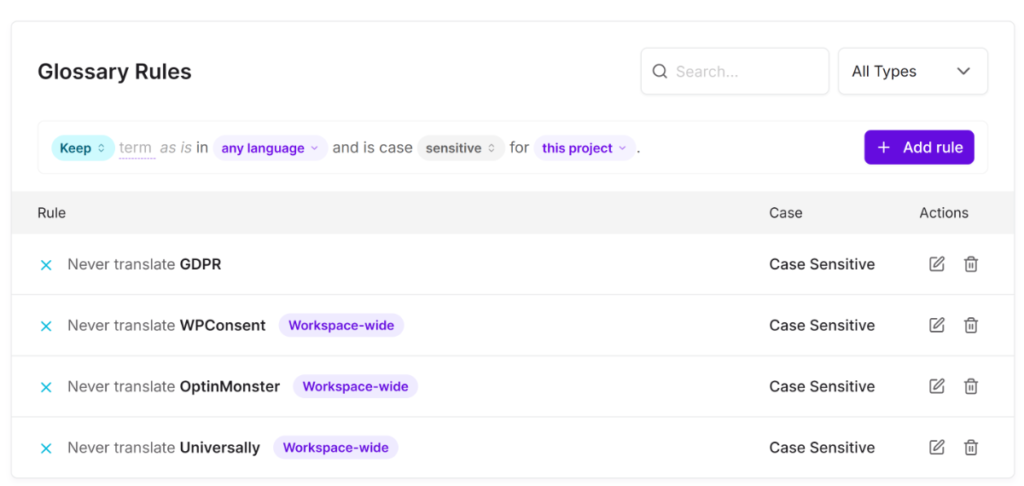
That’s it! The rule applies immediately, on pages you have already translated and anything you publish afterward.
You can verify if your glossary is working by switching your site’s language using your language switcher and spot-checking a few key pages.
For instance, check your homepage, a product page, and anywhere your brand names or product tagline appear. Confirm your protected terms are rendering correctly in each language before you consider your glossary finished.
Best Practices for Building Your Glossary
When it comes to setting up a translation glossary, here are some best practices to help out:
- Start with your brand name. It is the highest-visibility term on your site, and the one visitors notice first if something looks off.
- Add product and feature names next. Anything with a made-up or brand-specific name is a candidate for a Keep rule, especially if it happens to look like a real word in another language.
- Use Translate rules for taglines you care about. If you have a slogan you want translated but only in a version your team has approved, do not leave it to the AI’s default output.
- Revisit it when you launch something new. Add a new product or feature name to the glossary before it goes live in multiple languages, not after someone notices it translated incorrectly.
- If you manage client sites, keep a running list per client. Agencies handling multiple WordPress sites benefit from tracking each client’s protected terms somewhere central, so nothing gets missed when a new site gets connected.
You might also want to read our guide on multilingual SEO to see how Universally handles the rest of your translated site’s search visibility, and our Glossary Rules guide for more detail on advanced rule options.
Frequently Asked Questions
1. What is a translation glossary in WordPress?
A translation glossary is a list of terms, like brand names, product names, and slogans, that you lock in place so an AI translation plugin does not change them. Instead of guessing how to handle a term, the plugin follows the rule you have set for it.
2. Why do brand names get mistranslated by AI translation tools?
AI translation works by preserving meaning, and a made-up brand name does not carry a clear meaning of its own. Without a glossary rule, the AI may translate it literally or substitute a similar-sounding word in the target language.
3. Can I set different glossary rules for different languages?
Yes. A Translate rule lets you define a specific approved wording for a specific language, so the same term can have different approved translations depending on which language a page is in.
4. Does a translation glossary work for WooCommerce product names?
Yes. Once a product name or brand term has a glossary rule, Universally applies it to WooCommerce product titles and descriptions, not just blog posts and pages.
5. Do I need to fix my existing translated pages after adding a glossary rule?
No. Universally checks every translation against your glossary automatically, which covers pages you have already translated and anything you publish afterward.
If you’re managing a store or a client site where getting brand names right matters, setting up your glossary is worth doing before you publish translated content, not after.
We hope this article helped you learn how to set up a translation glossary in WordPress. You may also want to see our guide on how to add hreflang tags to WordPress and our list of the best WordPress translation plugins


Add a Comment