
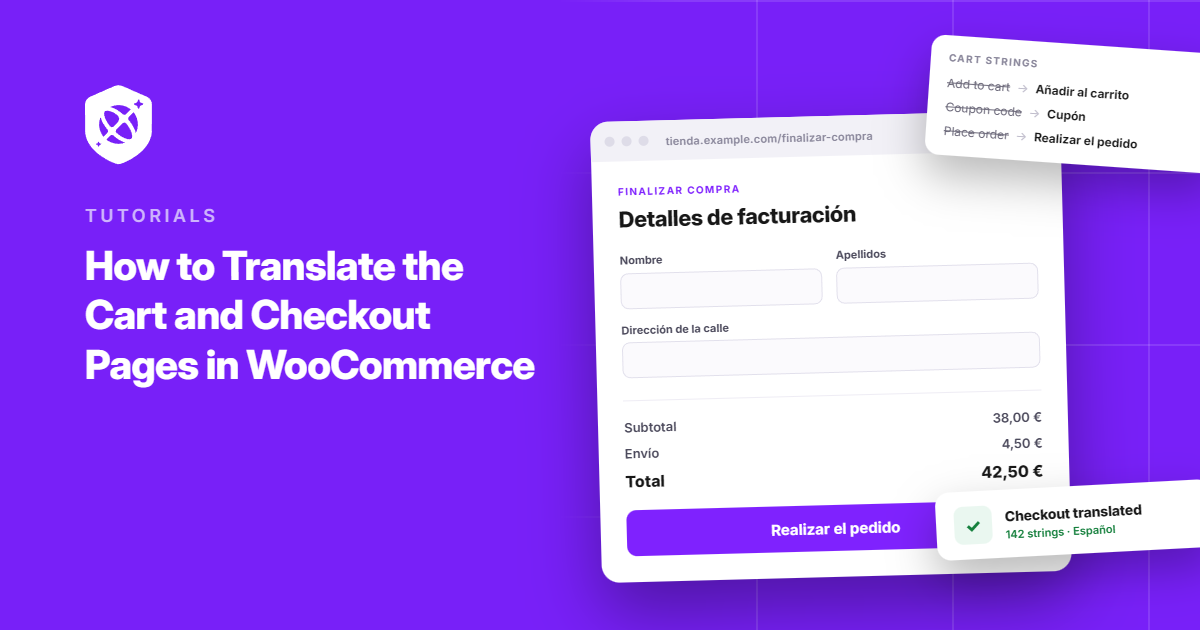
The first time I ran a full checkout test on a WooCommerce store in French, I got two fields from paying and hit a wall: the shipping method still said “Flat rate,” the coupon field still said “Apply Coupon.” Everything else on the site had translated. Checkout hadn’t.
That’s a more common problem than you’d think, and it’s an expensive one. Checkout is where every visitor has already decided to buy. When it stops making sense to them there, in their own language, that decision reverses at the worst possible moment.
So let’s fix that. In this guide, I’ll walk you through how to translate the cart and checkout pages in WooCommerce.
Why Translate WooCommerce Cart and Checkout Pages
Think about it this way: translating a blog post helps a visitor understand your brand. Translating the cart and checkout closes a sale.
Treat those as the same job, and you’ll end up with a fully translated homepage sitting in front of an English-only payment form, which is exactly the kind of mismatch that costs you the order.
Here’s why that mismatch matters so much:
- Shoppers overwhelmingly prefer buying in their own language. CSA Research surveyed 8,709 consumers across 29 countries and found that 76% prefer to buy when the information is in their native language, and 40% say they’ll never buy from a site in another language at all.
- Cart abandonment is already high before language even becomes a factor. Baymard Institute’s aggregate of 50 studies puts the average cart abandonment rate at 70.22%. Every added friction point, including a cart or checkout that suddenly reads like a different site than the one your shopper was just browsing, adds directly to that number.
Put those two together, and you can see why translating cart and checkout specifically, not just the rest of your store, matters so much. It’s where a language mismatch has the most direct line to a lost sale.
That said, WooCommerce ships as a single-language plugin. Its static labels, like menu items and default button text, come from translation files that a general-purpose translation plugin can usually pick up without much trouble.
But cart and checkout are a different story. Most of what your shopper reads there isn’t static template text at all. It’s generated per session, based on what’s actually in the cart.
So if you’re using a translation approach that only scans and caches static content, it’ll translate your About page beautifully and still miss half of checkout. Simply because half of the checkout doesn’t exist as fixed content until a customer actually starts shopping.
To fix this, let’s look at how you can translate the WooCommerce cart and checkout page.
Translate WooCommerce Cart and Checkout Pages
To make sure that all the content on your checkout page and shopping cart gets translated accurately, you need a tool that offers context-aware translations. This is where Universally comes in handy.
It is the best AI-powered translation tool for WooCommerce that translates your entire store and WordPress site into 110+ different languages. What sets it apart from other solutions is that it uses AI to understand the context and maintain your brand voice.
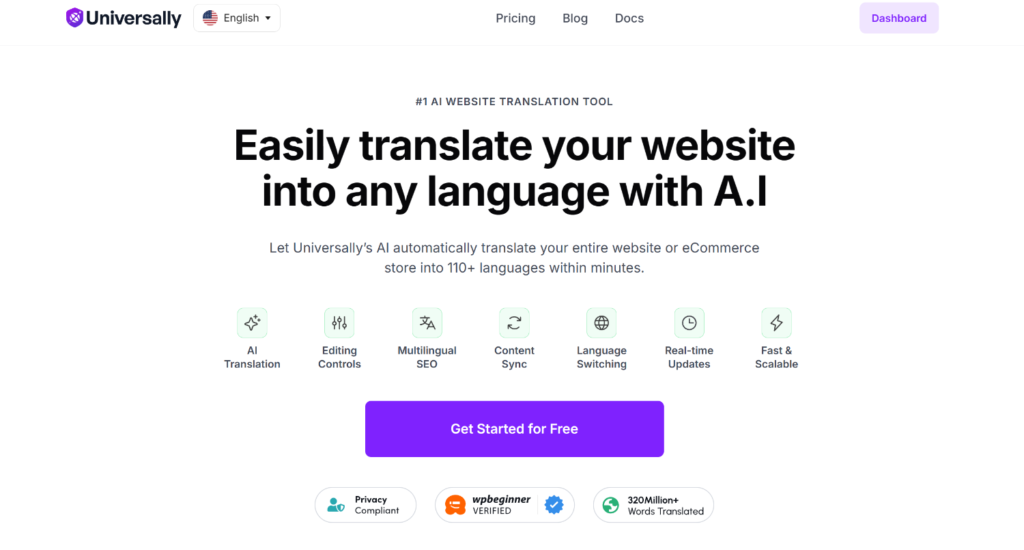
You connect your site, pick your languages, and it translates your pages the moment someone requests them in a new language, then caches the result so nothing gets retranslated from scratch.
Here’s what you get with it:
- 110+ languages, translated with context-aware AI that follows meaning and tone rather than swapping words one for one
- Automatic WooCommerce coverage, including cart, checkout, product pages, and category pages, with no manual per-product translation
- Built-in multilingual SEO, so translated pages get their own subdirectory URLs, hreflang tags, and translated metadata without extra plugins
- Glossary rules, so you can lock in brand names, product names, and other terms you never want the AI to touch
- Page exclusion rules, so you can keep specific pages, like legal or staging pages, untranslated on purpose
- A built-in language switcher that shows up automatically and can be repositioned or placed anywhere in your theme
- No code is required anywhere in the setup
You can try it for free (2,000 words and one language), with paid plans starting at $7.50/month if you need more room to grow.
Now, let’s look at the steps you need to follow to get started.
Step 1: Create Your Universally Account and Connect WordPress
If you haven’t set this up yet, here’s what you’ll need to do. Head to the Universally website and sign up for a new account.
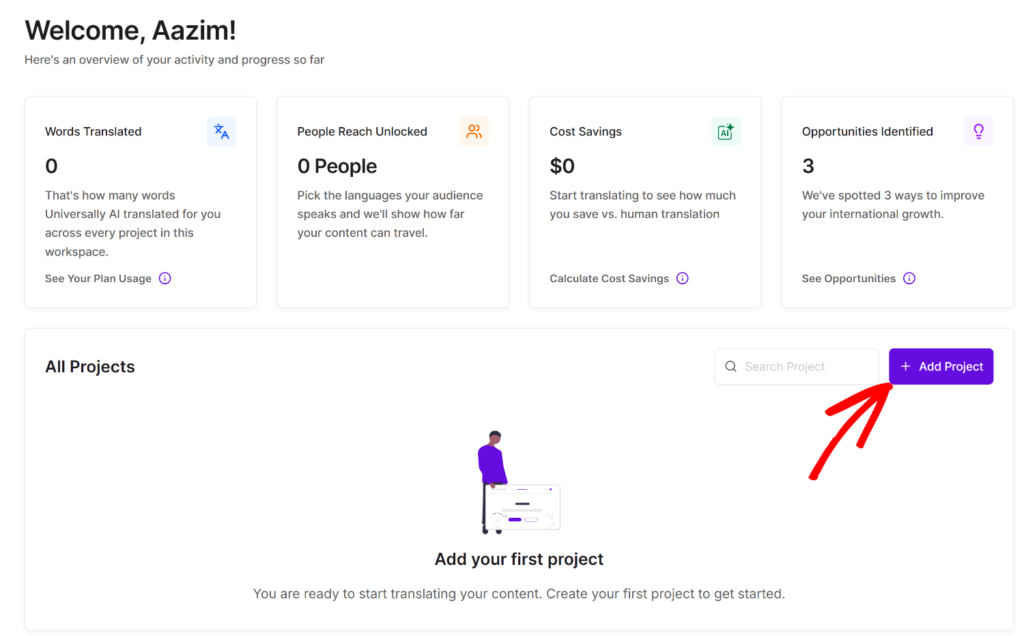
Once you’ve created an account, you’ll see the Universally dashboard. Go ahead and click the + Add Project button.
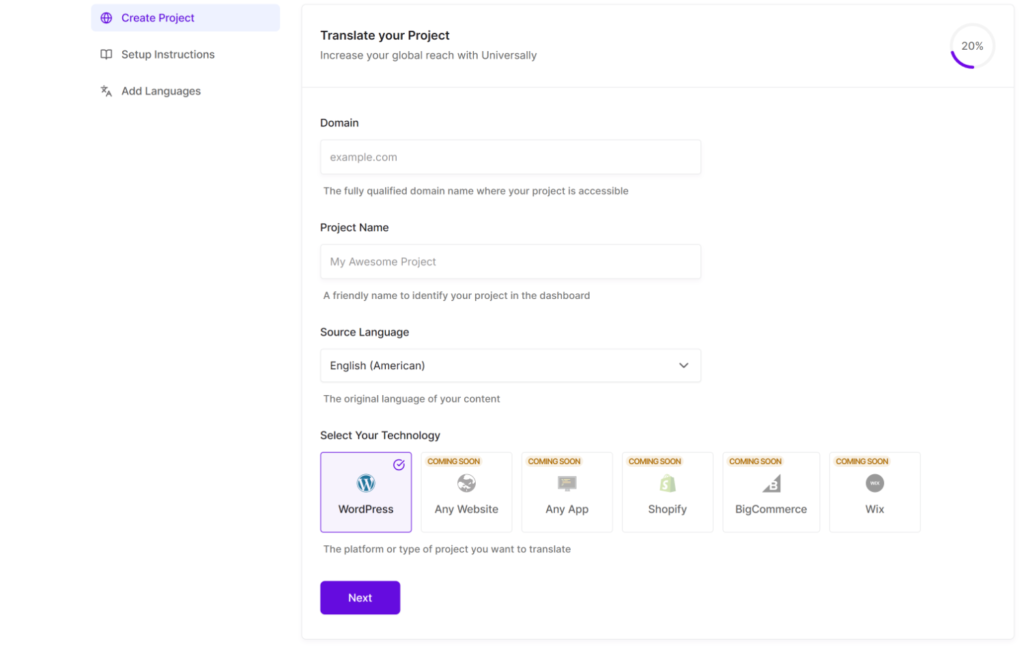
After that, you will need to fill in your store’s domain, give the project a name, and set your source language.
From there, you can pick WordPress under “Select Your Technology” and hit Next.
On the next screen, you should see instructions for configuring Universally in WordPress.
Simply click the Install Plugin button or grab the plugin’s .zip file through the download link.
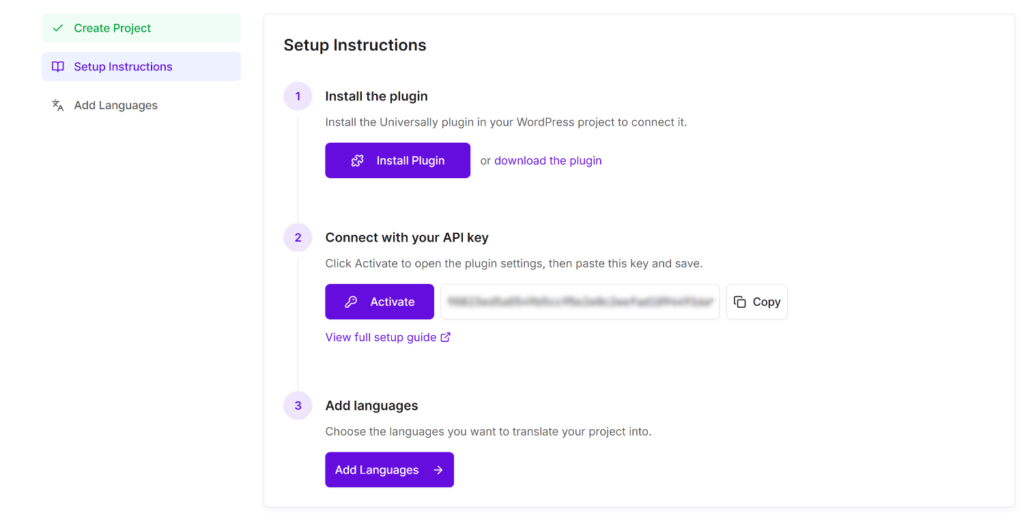
Now, head to your WordPress site and upload the plugin. Then, you can install and activate it. If you need help, then please see this guide on how to install a WordPress plugin.
Once it’s activated, you’ll land on a welcome screen. Go ahead and click Connect to Universally and follow the setup wizard to finish linking your site.
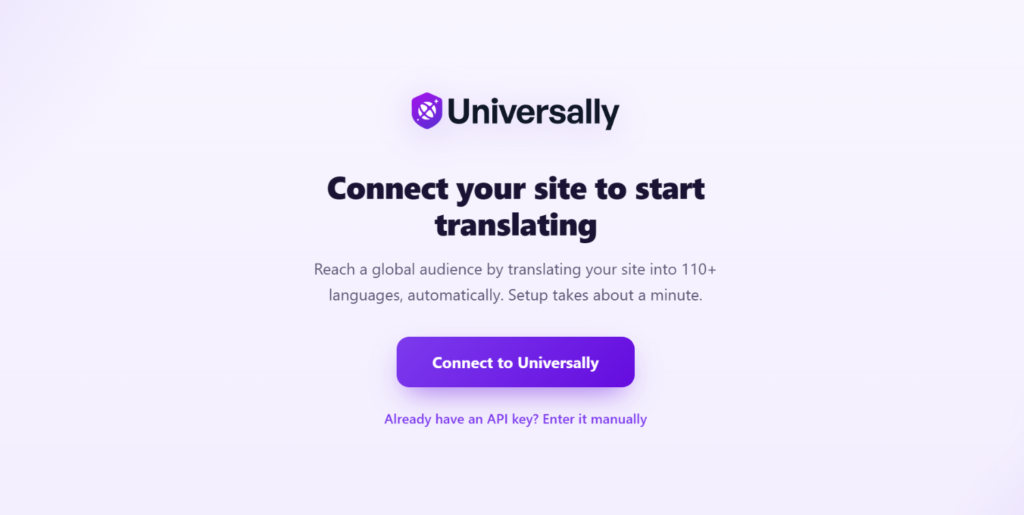
That’s the same setup whether you’re translating your whole catalog or just cart and checkout.
If you want the full walkthrough with screenshots, check out how to create a multilingual WooCommerce store.
Step 2: Add the Languages Your Customers Actually Shop In
Now, let’s get your languages set up so customers can shop in their native language.
To start, go to your Universally dashboard, open your project’s Languages tab, and click Add Language.
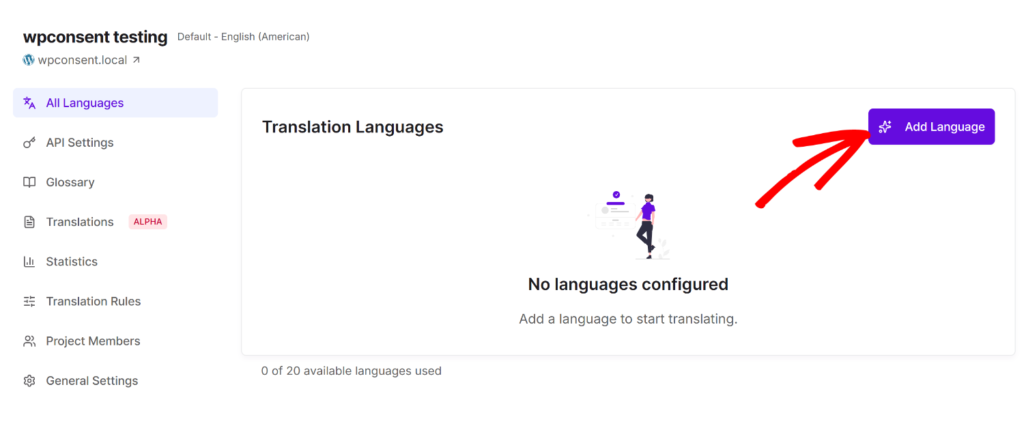
Pro Tip: You’ll want to pick the languages where you’re already seeing traffic, not just the biggest markets in general. If you’re not sure where to start, your Google Analytics report is the fastest way to check.
Next, a new pop-up should open to choose from 110+ languages. You can go through the list and select a target language.
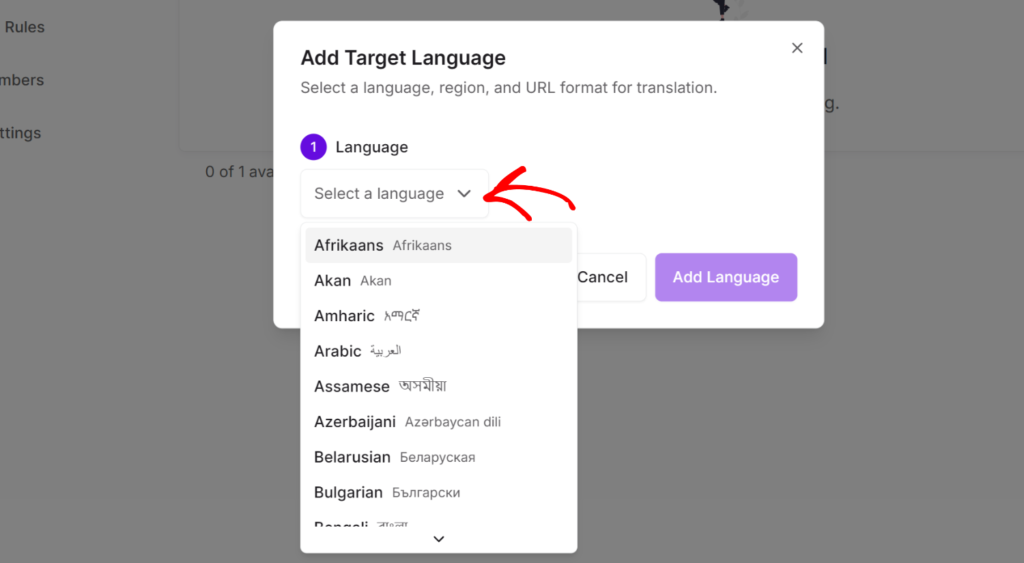
After selecting a language, Universally also lets you select a region and URL format.
Region: Some languages are spoken across more than one country, so this is where you tell Universally which one you mean. For instance, French for France versus French for Canada, or Portuguese for Portugal versus Portuguese for Brazil.
URL format: This decides how your translated pages actually show up in the address bar. Universally defaults to the subdirectory format Google recommends for multilingual SEO, so your Spanish pages would live at yourstore.com/es/, your French pages at yourstore.com/fr/, and so on. Your hreflang tags point to that same format, so it’s best left alone unless you have a specific reason to change it.
Go ahead and click the Add Language button when you are done.
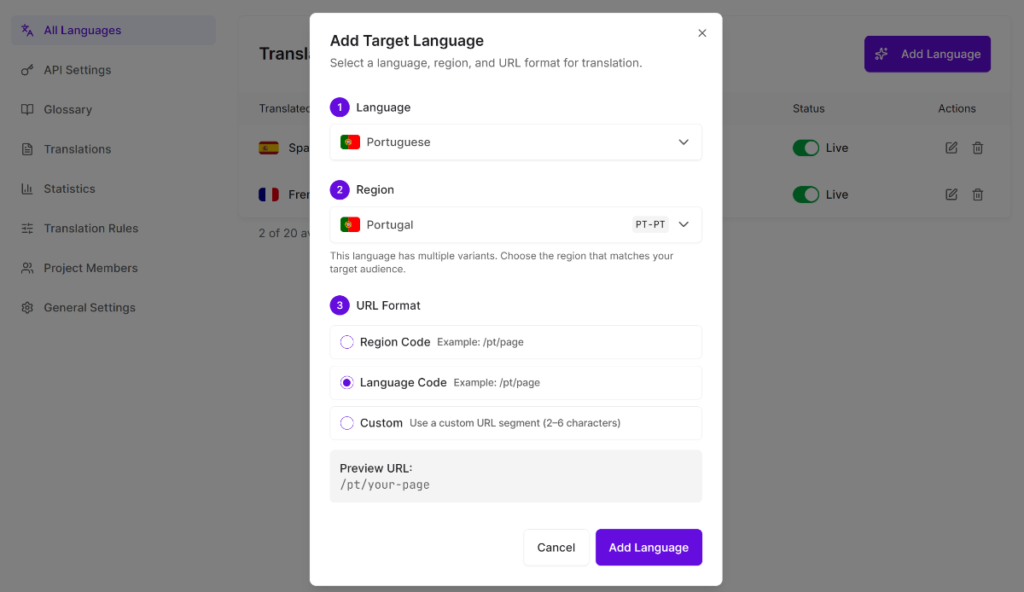
You can now repeat this step to add additional languages for your WooCommerce store.
Universally will now automatically translate your store, including the checkout page and shopping cart.
Step 3: Load Your Cart and Checkout Pages to Trigger Translation
Here’s something worth knowing: Universally translates a page the first time it’s requested in a new language, then caches the result.
So go ahead and visit your own cart and checkout. Next, you can use the language switcher to change the language on your WooCommerce store and see the checkout and cart languages also change.
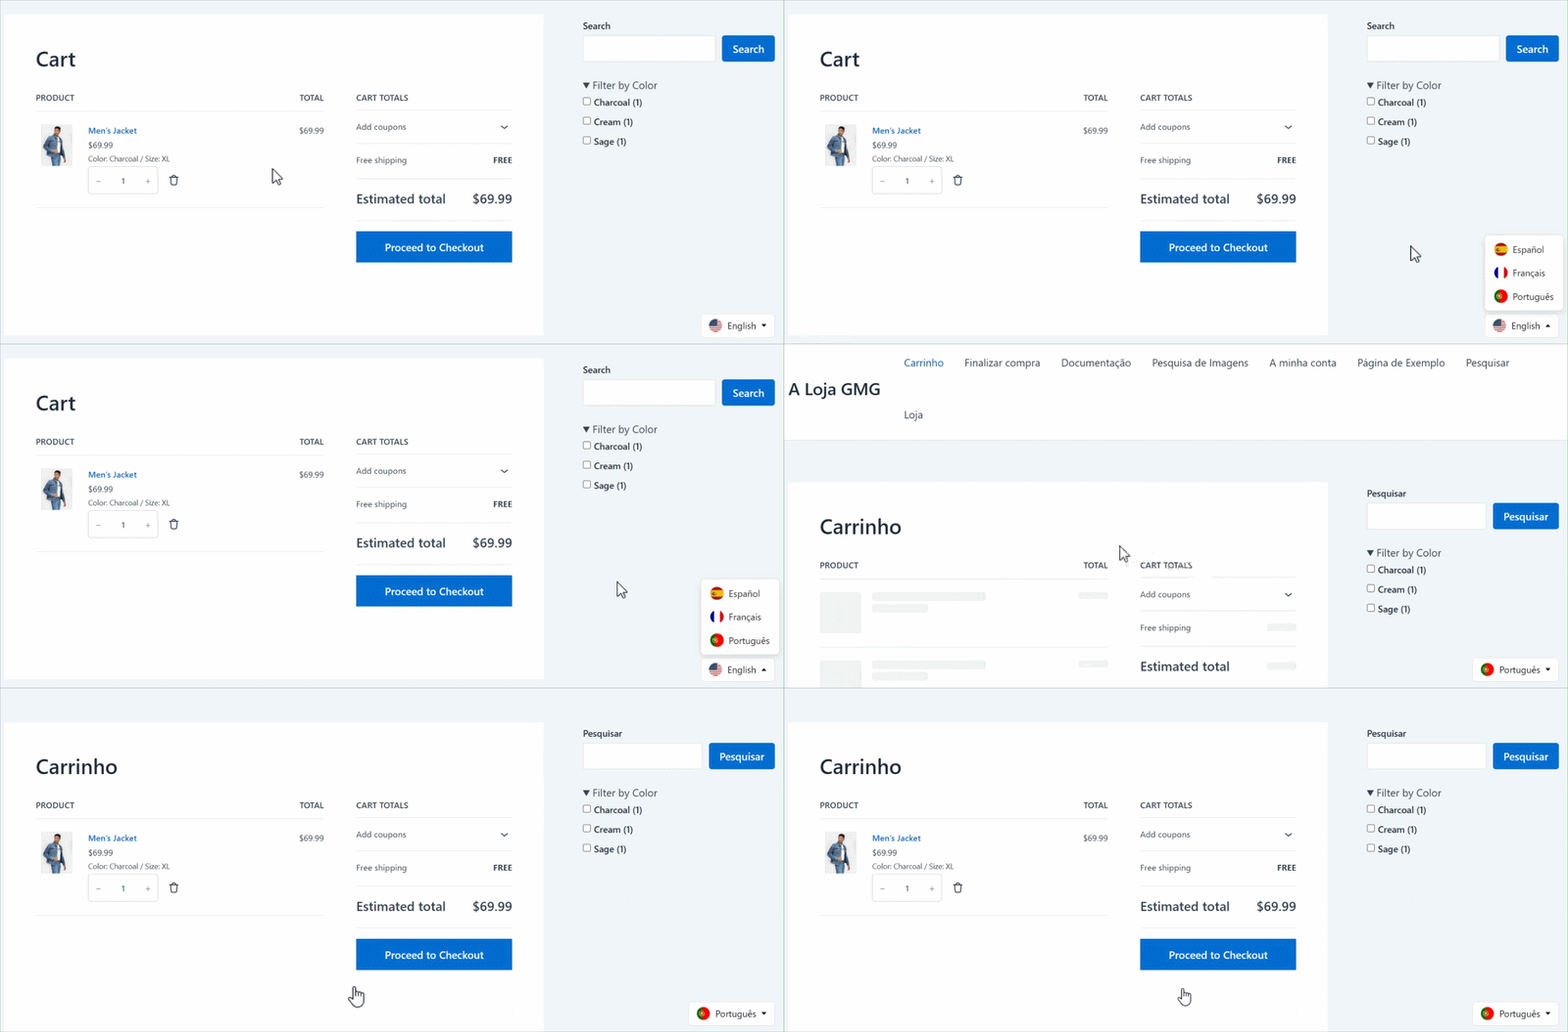
You will also notice that the language prefix in the URL changes to something like yourstore.com/es/cart/ and yourstore.com/es/checkout/.
Step 4: Use Glossary Rules to Lock In Checkout-Specific Terms
Once checkout is translated, it’s worth spot-checking for terms the AI shouldn’t have touched: your brand name, a payment gateway’s proper name, a shipping method you deliberately worded a certain way.
Simply head to Glossary in the Universally dashboard and click Add Rule.
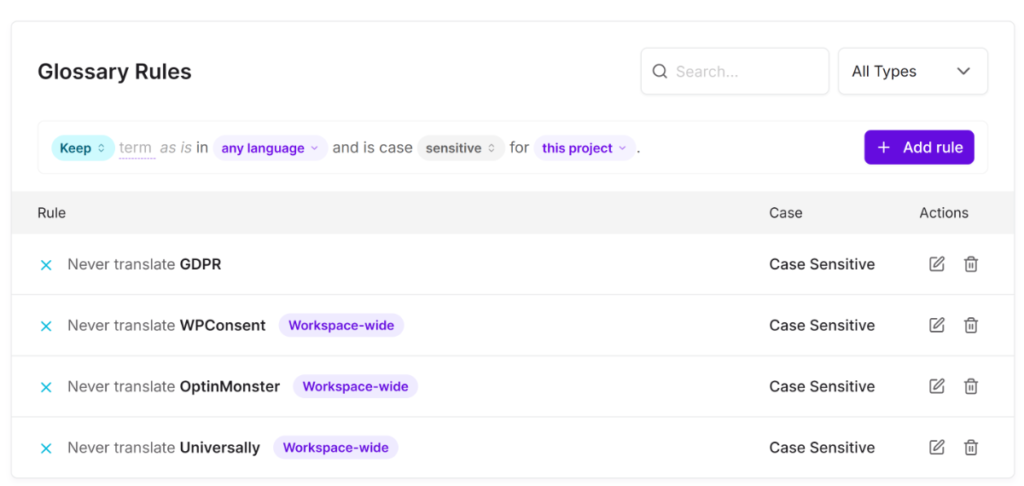
A Keep as is rule leaves a term untouched in every language, while a Translate rule forces a specific wording instead of whatever the AI would pick on its own.
You can also select Match the Exact term or use Patterns for a family of terms, like product SKUs.
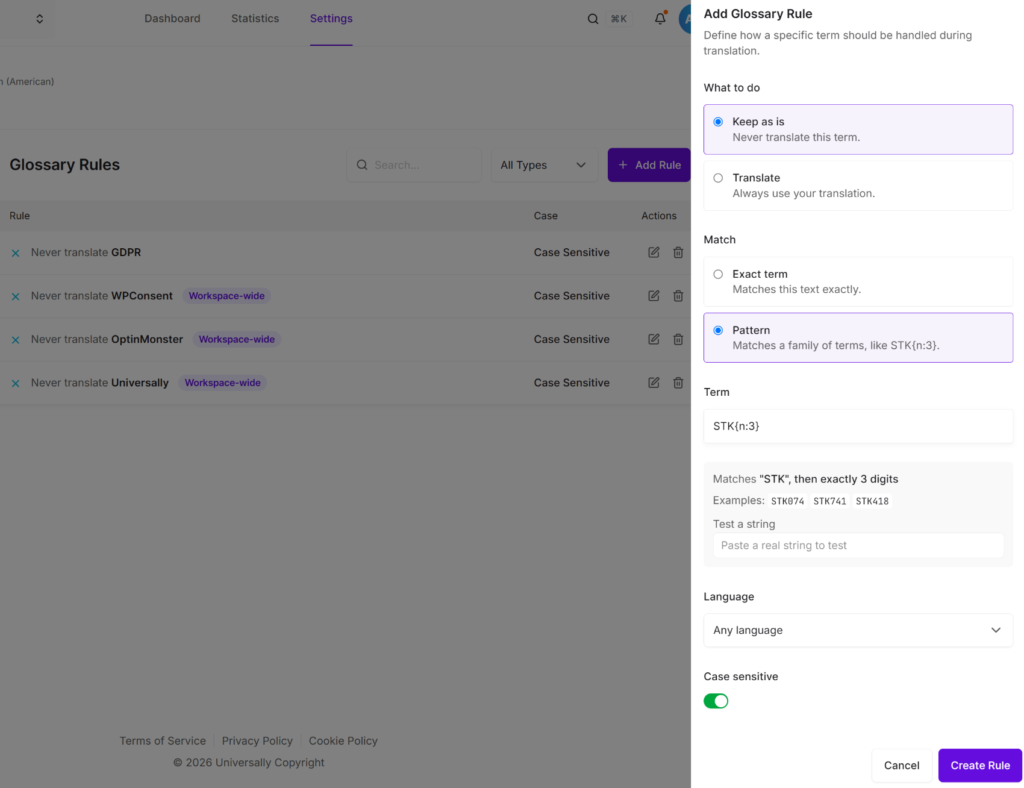
Go ahead and add a Keep rule for your brand name and any payment method names that shouldn’t change, then reload checkout in each language to confirm it applied.
This can help avoid confusion around important checkout terms: a mistranslated payment method name or a stiff shipping label is the kind of thing that quietly costs you a sale, not just an awkward sentence buried in a blog post.
You can learn more by following our guide on how to set up a translation glossary in WordPress.
Step 5: Use the Visual Editor to Fine-Tune Translations on the Frontend
Once checkout is translated, review it the way a shopper actually sees it, not as a list of strings. With the visual editor, you can edit translations in real time.
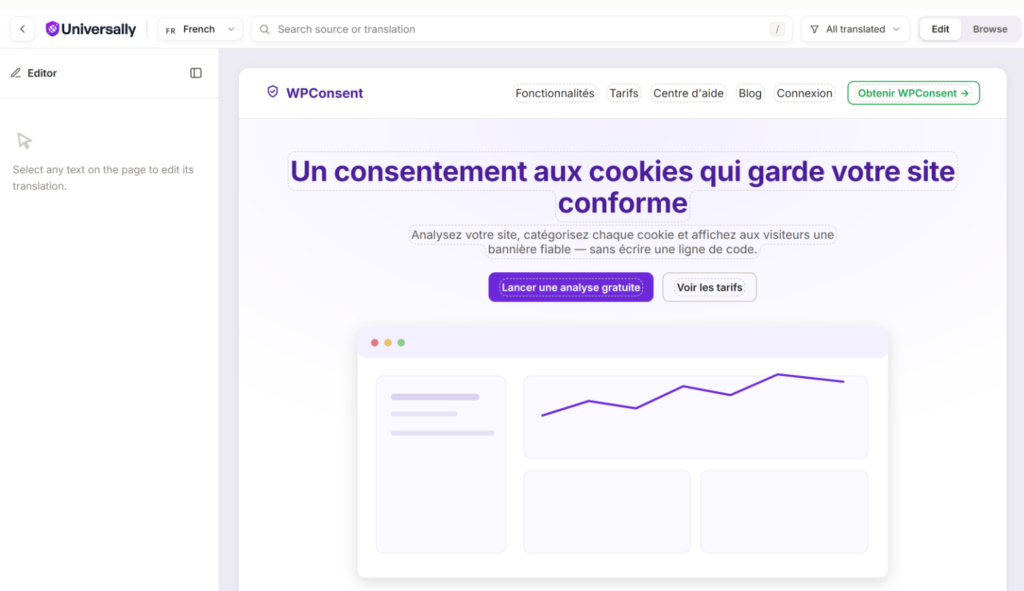
Simply open the Visual Editor from your Universally dashboard, pick your checkout page, and you’re looking at your real, live site instead of a mockup.
You can click directly on any field label, button, or shipping description to edit it right where it sits. Those can look fine in a list of translated strings, but the Visual Editor shows you the actual rendered page, so a label still stuck in English, or a translation wrapping awkwardly inside its button, is obvious the moment you look.
Use the language switcher at the top of the editor to flip between languages as you review, and check the status next to each string: AI-translated, verified, or unchanged from the source.
Common Mistakes That Leave Checkout Half-Translated
A few issues show up again and again, even on stores that already have a translation plugin installed:
- Full-page caching serves an English checkout to non-English visitors. Cart and checkout content is dynamic, so you’ll want to keep it outside full-page cache rules, or serve it through fragment caching that respects the visitor’s language.
- Payment gateway plugins render their own hardcoded text. Some gateway integrations print button labels or disclaimers outside the normal template flow, which can slip past a translation pass that isn’t specifically checking the rendered checkout output.
- Currency and language get treated as the same problem. Translating “Total” into French doesn’t change the number next to it from USD to EUR. Currency conversion is a separate setup step, not something translation handles.
- The transactional order email is assumed to be covered. It isn’t. WooCommerce sends that email server-side, outside the page-translation flow, so you’ll need a dedicated email-localization plugin if you want it in the customer’s language too.
Frequently Asked Questions
1. Does WooCommerce support multiple languages by default?
WooCommerce does not support multiple languages by default. Its static labels can be translated with standard WordPress translation files, but dynamic checkout content like shipping labels, payment gateway text, and validation messages isn’t part of that file, so a translation tool that works at the page-rendering level is needed to catch it.
2. Can I translate only the cart and checkout pages instead of the whole store?
You can translate only the cart and checkout pages instead of the whole store. Most translation plugins, including Universally, let you choose which pages get translated, and a lot of stores start there specifically since that’s where language mismatch hits sales the hardest, then expand to the rest of the site.
3. Will translating my checkout page also fix currency display?
Translating your checkout page will not fix currency display. Language and currency are two separate systems, so translating a word into the shopper’s language doesn’t change the currency the number is shown in; that requires a separate multi-currency setup.
4. Do I need a WooCommerce-specific plugin, or will a general WordPress translation plugin work?
A general WordPress translation plugin can work for WooCommerce checkout, provided it also translates dynamic, rendered content rather than static page text alone. Since most of what’s on cart and checkout is generated per session rather than stored as fixed content, that’s the deciding factor, not whether the plugin is marketed for WooCommerce specifically.
5. How do I check whether my WooCommerce checkout is fully translated?
The most reliable way to check whether your WooCommerce checkout is fully translated is to run a real test order in each language you support. Add a product, apply a coupon, click through every shipping and payment method, and read every line, including the validation errors and the order confirmation page, before you submit.
6. Does Universally translate the WooCommerce order confirmation email too?
Universally does not translate the WooCommerce order confirmation email. It translates pages as they’re rendered in the browser, which covers the order confirmation page a shopper lands on after paying, but the confirmation and shipping emails WooCommerce sends afterward are generated server-side and sit outside that flow. A dedicated transactional email plugin is needed if translated order emails matter for your store.
We hope this article helped you learn how to translate the cart and checkout page in WooCommerce. You may also want to see our guide on how to exclude pages from translation in WordPress and our list of the best WordPress translation plugins


Add a Comment