
Universally is in the WordPress plugin directory, so installing it takes three clicks from your own admin: search, install, activate. Activating opens a setup flow that connects the site to your Universally account, and you do not need an API key in hand to start.
Before you start
- WordPress 6.0 or later and PHP 7.4 or later. Check under Tools » Site Health » Info if you are unsure. Most hosts are well past both.
- An administrator account on the site. Editors and authors cannot install plugins.
Step 1: Install the plugin
In your WordPress admin, go to Plugins » Add Plugin and search for universally.
The plugin you want is Universally – AI Translation & Multilingual SEO, by Syed Balkhi. Choose Install Now.
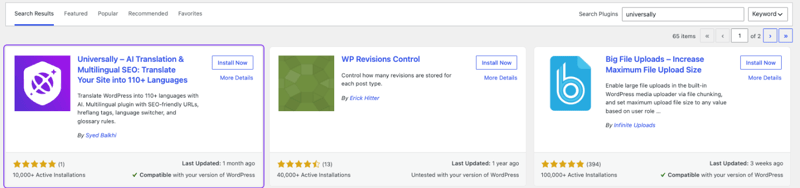
Nothing to download by hand, and nothing to unzip. Updates then arrive the same way as any other plugin, through Plugins » Installed Plugins.
Step 2: Activate it
Once the install finishes, the button on the same card becomes Activate. Choose it.
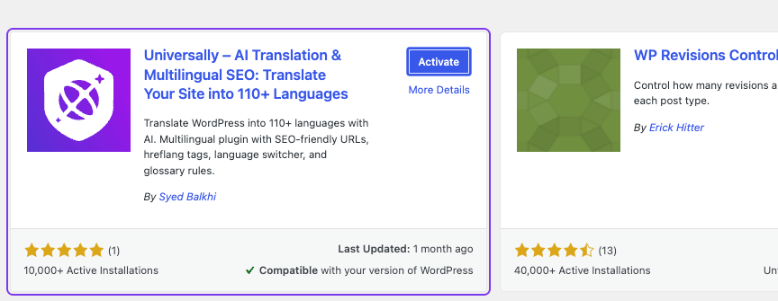
Universally appears in the admin sidebar, with General, Language Switcher, Styling and Preferences underneath. If the menu does not appear, your PHP version is likely too old: check Tools » Site Health » Info » Server for PHP 7.4 or later.
Step 3: Connect the site
Activating takes you straight to a Welcome to Universally screen. Choose Let's Get Started and follow the prompts, which cover account setup, your plan, and your languages before returning you to WordPress.
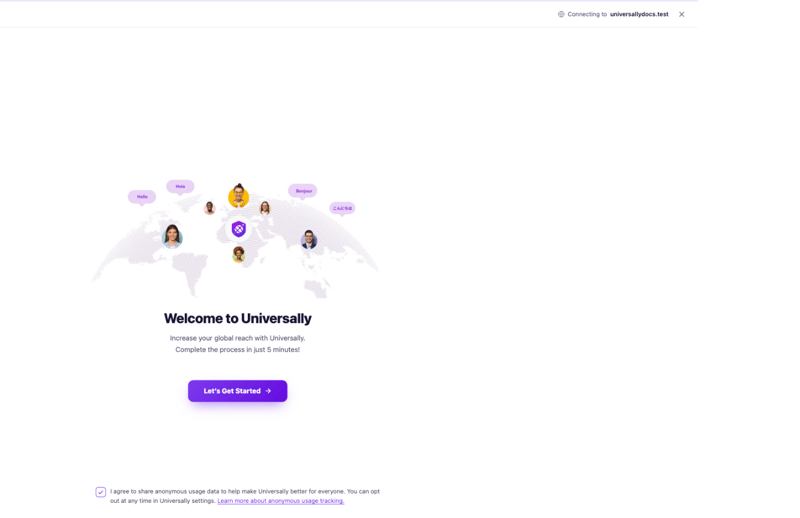
The checkbox at the bottom shares anonymous usage data. It is optional, and Preferences in the plugin lets you change it later.
If you close that screen, the same flow waits under Universally » General, in the API panel:
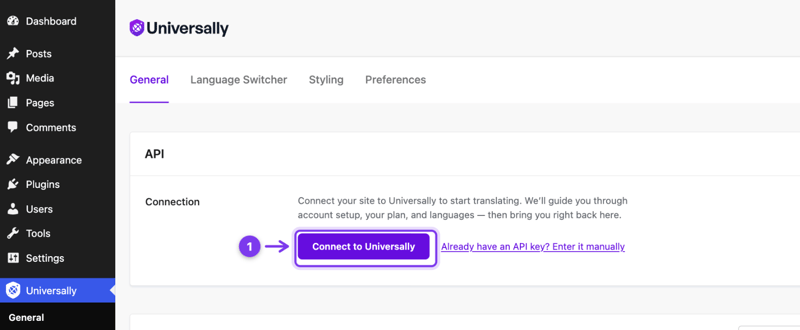
Already have an API key? Use Enter it manually instead, and paste the key from your project's API Settings page in the dashboard. This is the path to use when the site belongs to a project that already exists.
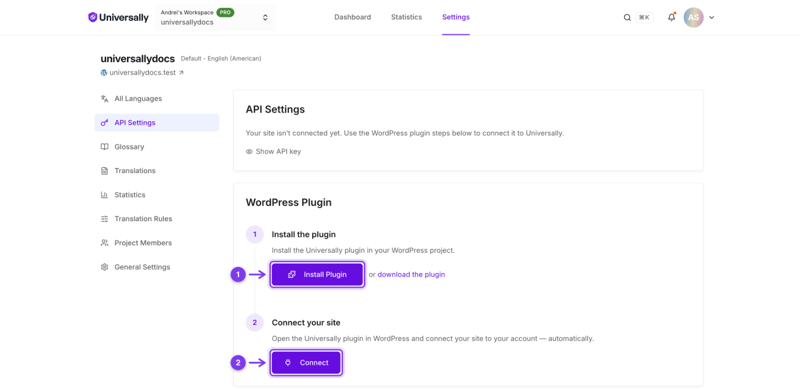
The same screen mirrors the two steps from the dashboard side: Install Plugin and Connect. Either direction ends up in the same place.
Treat the key like a password. Anyone holding it can spend your translated words, and Regenerate on that same page replaces it if it leaks.
Step 4: Verify it works
Add at least one target language, then open your site with that language's code in the URL, for example https://yoursite.com/fr/.
Languages can be added from either side. Universally » General » Languages in WordPress lists each language with its live URL and a copy button, refreshes the list, and can add one of the suggested popular languages in a single click. Add Languages on that panel opens the project's language screen in the dashboard, which has the full list of 110. See Add and remove languages.
The first request takes a few seconds while the page is translated. After that it is cached and loads immediately. Seeing your homepage in the new language means the connection is live. See Verify your installation for the fuller check.
Disconnect a site
Universally » General » API » Disconnect ends the link. Translation stops, the plugin forgets its copy of the key, and the dashboard stops showing the site as connected. Use it when you are moving a site to another project, cleaning up a staging clone, or handing the site over.
Two things it does not do:
- It does not invalidate the API key. If the key leaked, use Regenerate on the project's API Settings screen as well.
- It does not delete anything. Your languages, stored translations and glossary rules stay in the project, and reconnecting the same site picks them back up.
To reconnect, run the connect flow again from the same API panel.
Troubleshooting
No Universally menu after activating. PHP is probably older than 7.4. Check Tools » Site Health » Info » Server.
Connecting fails or hangs. The site needs to make outbound HTTPS requests to api.universally.com. Some managed hosts block outbound traffic until you allowlist the domain.
"Destination folder already exists" when installing. An older copy of the plugin is still on the server. Choose the option to replace it.
Translated URLs return 404. The prefix in the URL did not match an enabled language. Confirm the language is added and enabled for the project, then use Refresh under Universally » General » Languages and compare the URL in that table with the one you typed. A regional variant can use a country prefix such as /mx/ rather than /es/. Re-saving permalinks does not help: Universally adds no WordPress rewrite rules.