
The whole path from nothing to a translated page, on WordPress. It takes about five minutes, and most of that is installing a plugin.
Before you start
- A WordPress site you can install plugins on
- An email address
If you are not on WordPress, the shape is the same but you connect through the API instead. See Integrate using the API.
1. Create the project
Sign up, then create a project for your site. You give it a name, its domain, and the language your content is written in now. Select Your Technology is already set to WordPress, and the other platforms show as Coming Soon, so there is nothing to decide there.
The source language matters: it tells Universally what it is translating from, and getting it wrong produces poor translations rather than an error.
2. Add a language
Open the project, choose All Languages, then Add Language. Pick one language and its region.
Start with one. You can add more at any time, and one language is enough to confirm the whole path works before you commit words to several.
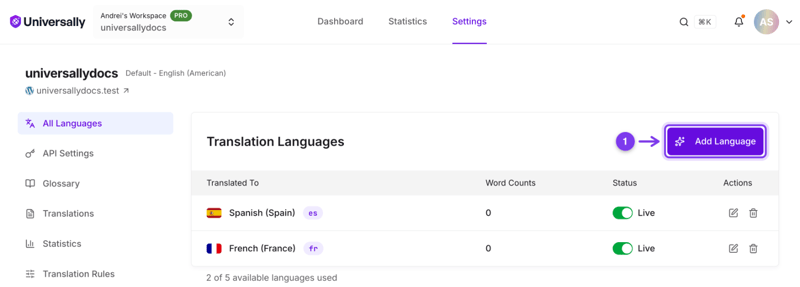
For languages with more than one variant, such as Spanish or Chinese, the region you choose decides how the text reads. See Language variants and regional targeting.
3. Install the plugin
In WordPress, go to Plugins » Add Plugin, search for universally, then Install Now and Activate.
See Install on WordPress for this in detail.
4. Connect the site
Activating opens the setup flow by itself. Choose Let's Get Started and it signs you in and links the site, without you handling a key at all.
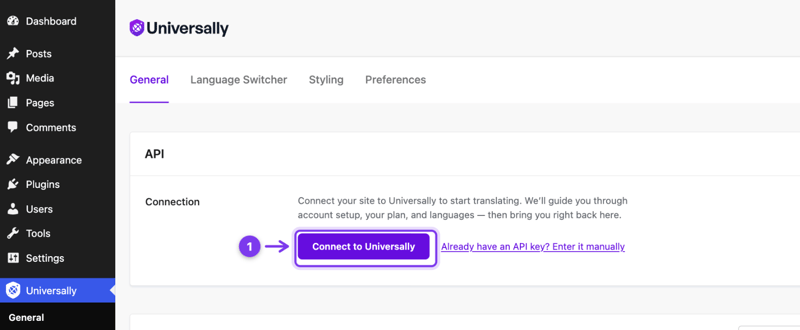
If the site belongs to a project you already created, take the other route: Already have an API key? Enter it manually, then paste the key from the project's API Settings. See Find your API key.
Until the connection succeeds, the plugin is installed but doing nothing.
5. Look at a translated page
Visit your site with the language prefix in the URL: /es/ for Spanish, /de/ for German, followed by a page path.
The first load is slow. That is the page being translated for the first time. Reload it and it will be fast, because the translation is now stored. This is the single most common thing mistaken for a problem.
6. Check the switcher
The switcher should appear on your pages, letting visitors change language without editing URLs.
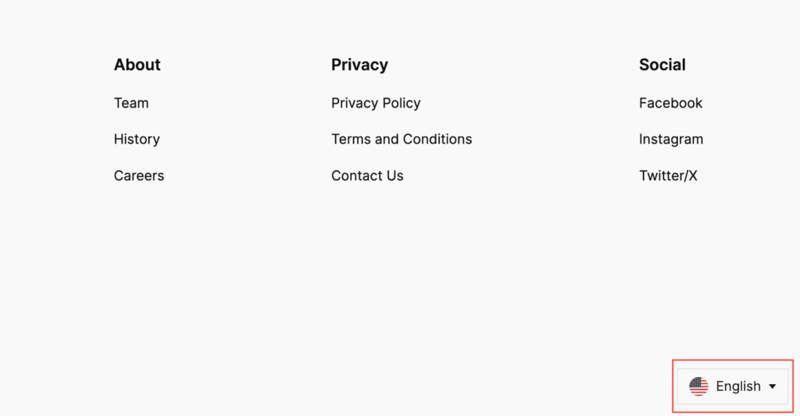
If it is missing, the plugin's Implementation setting is probably set to Custom, which means you place it yourself. See Place the language switcher.
What to do next
Warm up the pages that matter. The first request for a page in a new language is the slow one, because that is when it gets translated. Visit your important pages in each language yourself and visitors will only ever hit the fast, cached version. See Performance and page speed.
Exclude what should not be translated. Checkout, account and admin paths. See Exclude pages.
Protect your brand names. A glossary rule keeps a term identical in every language, including in text translated later. See Glossary rules.
Fix anything that reads badly. Machine translation gives you a first version; you can edit any string by hand. See Edit translations manually.
If nothing is translated
Work through Translations are not appearing. The usual causes are the API key not saved, no language added, or a cached copy of the original page.